Tuesday, June 27, 2017

Beautiful Graduation


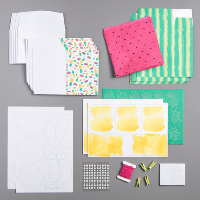
This card was inspired by a post I saw on the Demonstrator Planning Place, but I made mine with Fresh Fig.  Here are my instructions:


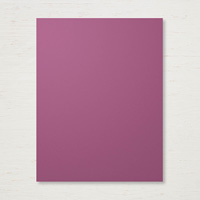
1.     Base of card is Fresh Fig cut at 4-1/4” x 11” and scored at 5-1/2” in the middle.
2.    The second layer is Whisper White cut at 4” x 5-1/4”.
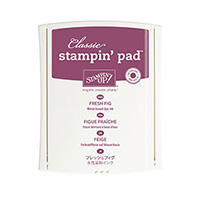
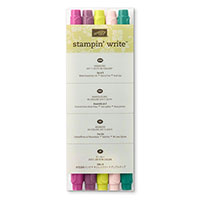
3.    Use the Embossing Buddy on the Whisper White cardstock.  The Beautiful You image is stamped with Versamark Ink Pad.  Sprinkle Gold Embossing Powder over it and shake off excess.  Heat set with Heat Tool.  Color in with Fresh Fig Marker
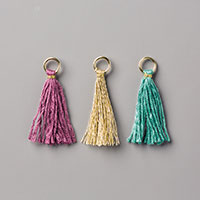
4.    Cut a ½” square of Fresh Fig for the cap and attach to her head with a Dimensionals and then a Gold Mini Tassel is attached with a Glue dot.
5.    Roll up a small roll of copy paper for the Diploma and attach 1/8” Gold Ribbon.
6.    Ink up “Celebrate” with Versamark ink and sprinkle Gold Embossing Powder and heat set with the Heat Tool.

Products I used:


Saturday, June 24, 2017

Friday, June 16, 2017

Happy Birthday Balloons


This makes a very nice "Happy Birthday" card for someone and I was inspired by a video I saw from the KitchenTableStamper.com.  However, I changed the base of my card and omitted a few things that she had.  I also used the Sizzex Adhesive Sheet to adhere my "Happy Birthday" die.  Here are the instructions for my card:


1.     Base of the card is Tempting Turquoise cardstock cut at 5-1/2” x 8-1/2” and scored at 4-1/4” in the middle.
2.    The second layer is Whisper White cardstock cut at 4” x 5-1/4”.
3.    Fresh Florals is cut at 1-1/4” x 4” and adhered to the left side of the Whisper White with adhesive.
4.    For the “Happy Birthday” measure 3-1/2” x 3-1/2” of Sizzix Adhesive Sheet and 3-1/2” x 3-1/2” of Basic Black cardstock to die cut through the Big Shot using the Precision Cutting Plate.  Peel off the backing.  Adhere to the Whisper White cardstock on the right.
5.    Ink up the small balloon stamp with Tempting Turquoise ink and stamp on Tempting Turquoise cardstock as far to the bottom of the cardstock as you can and do it upside down so that you can punch it out.  Punch out with the Balloon Bouquet Punch.  Do the same with Lemon Lime Twist and Berry Burst.
6.    Attach Baker’s Twine with a Glue Dot.  Make a loop around the bottom of the balloon and put the end through the loop and pull it tight, so it looks as though the string is wrapped around the bottom of the balloon.
7.    Use Multipurpose Glue to attach your balloons together for the arrangement before placing a Dimensional behind each one.  Now turn them over, and place a Dimensional behind each one.
8.    Put a little Glue Dot at the bottom of the card to hold the strings together.  Add die-cut bow (Pretty Pines Thinlets) or an In-Color Bitty Bow.  I used the color Berry Burst for my bow.
9.    Trim the stings if they are too long.

Products I used:

Thursday, June 15, 2017

Happy Birthday Gorgeous Baby Wipes

Glossy cardstock is back!  I'm so happy because I used it a lot back in 2007 with a technique using baby wipes.  Here are the directions for my card:


1.     Base of the card is Emerald Envy cardstock cut at 4-1/4” x 11” and scored at 5-1/2” in the middle.  Cut another piece of cardstock at 3-1/2” x 3-1/2”
2.    The second layer is Lemon Lime Twist cardstock cut at 4” x 5-1/4”.  Cut another piece of cardstock at 3-1/2” x 3-1/2”
3.    The third layer is Glossy cardstock cut at 3-3/4” x 5”.
4.    Take a Baby Wipe and fold it to about 1” in width.  Add 3 drops of Emerald Envy at one end and 3 drops of Lemon Lime Twist at the other end.
5.    Start just above the top of the Glossy cardstock with the Emerald Envy end wipe straight down the length with the baby wipe.  Then on either side, wipe with the Lemon Lime Twist side, and again on either side with the Emerald Envy.  Let dry!
6.    Cut two of the  Sizzix Adhesive Sheets at 3-1/2” x 3-1/2” and adhere one to the back of the 3-1/2” x 3-1/2” Lemon Lime Twist cardstock and the other to the 3-1/2” x 3-1/2” Emerald Envy cardstock.
7.    Use the Happy Birthday Thinlet to die cut out one of each.  Remove backing.
8.    Layer the Lemon Lime Twist “Happy Birthday” first and then offset with the Emerald Envy “Happy Birthday” as shown above.

Products I used:

Country Flowers

This card was made with a new set called Country Flowers in the new 2024-2025 Annual Catalog on page 50.  The technique is called paper piec...