Stamp
Set: Ice Cream Swirl (AC page 77),
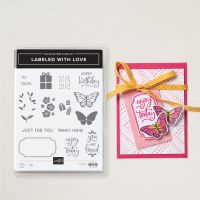
Labeled with Love
Cardstock: Basic Black, Garden Green, Real Red, Basic
White, 6” x 6” Fruit Salad DSP
Ink: Tuxedo Black Memento
Other: Stampin’ Cut and Emboss Machine, Paper
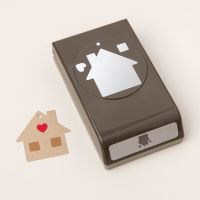
Trimmer, Spotlight on Nature Dies, Stylish Shapes Dies, 2” Circle Punch, Humble
Home Punch (heart), 3/8” Black and Very Vanilla Ribbon, Paper Snips, Stampin’
Dimensionals, Multipurpose Liquid Glue, Glue Dots
1. The base of the card is
5-1/2” x 7-1/2” Basic Black cardstock scored at 4-1/4”.
2. The Basic White cardstock
for the inside is 4” x 5-1/4”.
3. The Fruit Salad DSP is cut
at 1” x 5-1/4” for the inside watermelon rind. Adhere to the right side of the
Basic White insert with Multipurpose Liquid Glue.
4. For the outside, the
watermelon with seeds, it is cut at 3” x 5-1/4”. Wrap the ribbon around the bottom and adhere
with Tear and Tape/or Glue Dots on the back. Adhere the DSP with Multipurpose
Liquid Glue to the front flap.
5. Die-cut a Garden Green
circle from the Spotlight on Nature Dies, a Basic White circle with the 2”
Circle Punch, and a 2-1/4” Real Red circle from Stylish Shapes.
6. Stamp the sentiment “Hope
Your Day is Sweet” from the Ice Cream Swirl stamp set with Tuxedo Black Memento
ink leaving room for the heart at the bottom.
7. The little heart is Real
Red punched out from the Humble Home Punch and adhered below the sentiment with
a dot of Multipurpose Liquid Glue.
8. Layer all together with
Multipurpose Liquid Glue and adhere to the card with Multipurpose Liquid Glue
making sure you only put glue on one side and not the whole thing so you don’t
glue your card shut!
9. Tie a bow with the ribbon
and attach with a Glue Dot.
10. Inside: Ink up the
sentiment “Happy Birthday” from the Labeled with Love stamp set with Tuxedo
Black Memento ink.
11. Cut out a couple
watermelon pieces from the DSP to adhere with Multipurpose Liquid Glue
Products I used:


No comments:
Post a Comment
Thanks for taking the time to comment on my blog. You have made my day!