Monday, September 18, 2017

Painted Harvest and Autum DSP

This card was inspired by Shelly Godby and I loved how she masked the sunflower.  The base of my card is Early Espresso and the second layer is Very Vanilla.  At the bottom, I used the Painted Autumn DSP and used Garden Green Stitched Satin Ribbon around the front of the card where the DSP meets the Very Vanilla cardstock.  The sentiment is stamped in Early Espresso.  I used the leaf punch to include a leaf to give it dimension.  I used the Wink of Stella pen on the flower to make it sparkle.

Products I used:

Friday, September 15, 2017

Painted Harvest

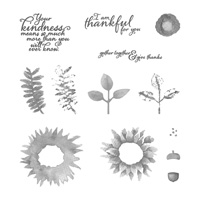
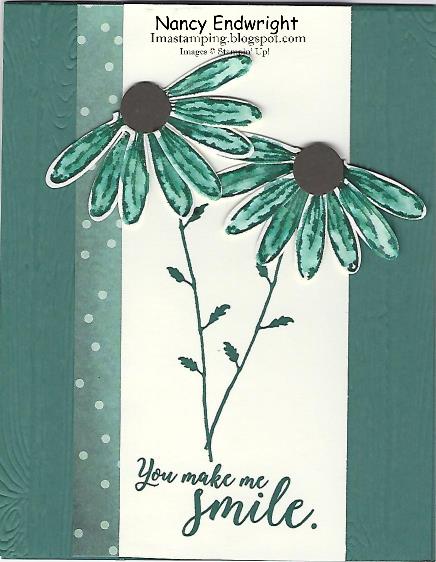
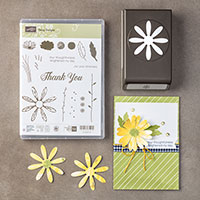
Painted Harvest is a beautiful new sunflower stamp set from the 2017 Holiday Catalog.  There are so many color possibilities to create the sunflower.  For this one, I just used Daffodil Delight for the base of the flower and for the outline stamp as well.  Here are my instructions:


1.     The base of the card is Crumb Cake cut at 4-1/4” x 11” and scored at 5-1/2” in the middle.
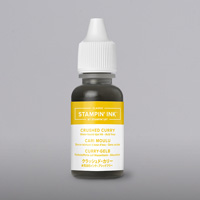
2.    The second layers are 3” x 3” Very Vanilla.  Ink up the first base sunflower stamp with Daffodil Delight. Twist the stamp and stamp again.  Now, take the outline stamp and ink it up with Daffodil delight.  Stamp over first image and twist and stamp.
3.    For the center, I used Soft Suede.
4.    I used a mask to stamp the outlines of the leaves with Garden Green first and then with Lemon Lime Twist for the leaf.
5.    Use the Stitched Shapes Framelits to die cut the largest square to create a 2-5/8” x 2-5/8” square.  Layer with Soft Suede card stock cut at 2-3/4” x 2-3/4”.
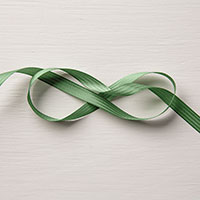
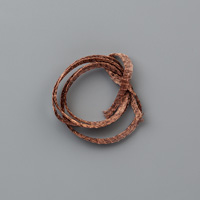
6.    Wrap the ¼” Copper Trim around both squares and tie on a box.
7.    Ink up leaves with Garden Green and stamp on the Crumb Cake front of the card and keep stamping without re-inking.
8.    Ink up the sentiment with Soft Suede and stamp in the lower right of the card.
9.    Add the sunflower square with Dimensionals.

Products I used:

Thursday, September 14, 2017

Creep It Real Bags

I thought the "Creep It Real" stamp set would be a cute one to have for my grand twins, but they are only 2 so they may have to wait before they can enjoy what's inside these cute little Halloween bags I bought for a $1.  Of course, the bags can also be made using our Designer Series Paper.  I inked up the stamp with Memento Black and colored it with Stampin' Write Markers and then cut them out and put Dimensionals on the back to attach to the front of the bags.  I tied them at the top with the 7/8" Black and White Striped Ribbon.

Products I used:


Sunday, September 10, 2017

Colorful Seasons - Baby Wipe Technique

The leaves are already starting to change in Indiana, so I couldn't wait to use the Colorful Seasons set with the leaves.  This baby wipe technique was inspired by Jackie Klompen.  The base of my card is Cajun Craze cut at 4-1/4" x 11" and scored at 5-1/2" in the middle.  The second layer is Basic Black cut at 3-1/4" x 4-1/2" and the third layer is Whisper White cut at 3" x 4-1/4" and then take a baby wipe (one without designs) and fold it up and put on a Clear Block E to use as your stamp pad.  Add 3 drops each ink refills of the Crushed Curry, Cherry Cobbler and Cajun Craze in the middle of the baby wipe.  Take the large leaf from the set and tap it around a bit to blend the colors and stamp along the left side of the Whisper White cardstock.  Do the same with the little leave stamp.  Use Memento ink to stamp the sentiment.  Then attach a bow at the top using the 1/4" Copper Ribbon to make a beautiful fall card.

Products I used:


Thursday, September 7, 2017

Daisy Delight in Tranquil Tide

It has been awhile since I've posted because I've been busy visiting family and friends, but I did some stamping last month before I left, so I'm going to share what I made now. This card similar to the one I saw on Pinterest and I thought it was gorgeous so I wanted to make one myself. It was inspired by Rachel Brumley.  The set is Daisy Delight (sentiment is from the stamp set Colorful Seasons). The colors are Tranquil Tide, Very Vanilla, Watercolor Paper and Delightful Daisy DSP.  The background was made using the Pinewood Planks 3-D Dynamic Textured Impressions Embossing Folder.  The DSP is cut at 1-1/2" x 5-1/2" and the ink is Tranquil Tide.  The flowers were stamped with Tranquil Tide on Watercolor Paper and then I used the Aqua Painter to watercolor the daisies and then punched them out with the Daisy Punch.  Then I cut them in half and added Early Espresso circles for the centers using a 1/2" Circle Punch.  I stamped the leaves and stems and sentiment on Very Vanilla cardstock cut at 2-1/4" x 5-1/2" and then attached the daisies with Dimensionals to pop them up.


Products Retiring Soon

  Hi Stampers: The Last Chance Products are on sale now!  That's right from 9-30 April, you can save up to 60% off of your favorite prod...