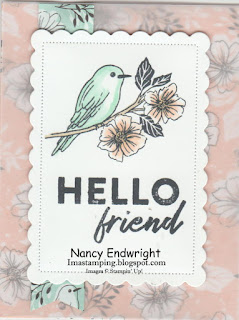
Stamp Set: Here Together
Cardstock: Polished Pink, Basic Black, Basic White, 6” x
6” All Together DSP
Ink: Tuxedo Black Memento, Versamark, White
Embossing Powder
Stampin’
Blends: Mediums #500 and #600
Other: Stampin’ Cut and Emboss Machine, Layering
Circles Dies, Paper Snips, Paper Trimmer, 3/8” Black Glittered Organdy Ribbon, Glue
Dots, Heat Tool, Mini Dimensionals, Multipurpose Liquid Glue, Dimensionals,
Wink of Stella
1. The base of the card is Polished Pink
cardstock cut at 5-1/2” x 8-1/2” and scored at 4-1/4” in the middle.
2. The second layer is Basic Black cardstock
cut at 4” x 5-1/4”.
3. The third layer is the new All Together DSP
cut at 3-3/4” x 5”.
4. Adhere Basic Black and All Together DSP with
Multipurpose Liquid Glue.
5. Wrap the ribbon around the back of the two
layers with Glue Dots holding in the back.
Adhere to the front of the card with Multipurpose Liquid Glue.
6. Die-cut a large Basic White circle with the
Layering Circles Dies in the Stampin’ Cut and Emboss Machine. Also, die-cut a Polished Pink scallop circle
slightly bigger.
7. Ink up the stamps with the heart hands with
Tuxedo Black Memento. Color the hands in
with the #500 and #600 Stampin’ Blends.
Adhere to the pink scallop circle.
8. Ink up the sentiment with Versamark ink on
Polished Pink cardstock. Add the White
Embossing Powder and heat set with the heat tool. Use the Paper Snips to trim around the
sentiment and layer below the hands with Multipurpose Liquid Glue.
9. Die-cut a Polished Pink heart and adhere
with a Mini Dimensionals and Glue to hold inside the heart shaped hands.
10. Put Dimensionals on the back of the circles
and adhere to the front of the card.
11. Add Wink of Stella to the small heart.


")
")


 Sheer Ribbon")


")


 Denim Ribbon")


 Designer Series Paper")