Monday, February 13, 2017

Love You Lots Chick


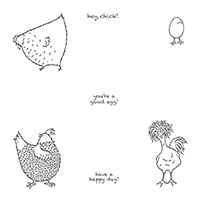
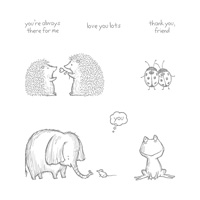
This is a combination of the 2017 Sale-a-Bration Hey, Chick! set and the 2017 Occasions set Sealed with Love.  The base of the card is Real Red with a layer of Whisper White.  The ribbon is the Real Red Stitched Satin Ribbon in the annual catalog.  I stamped the chick with Black Memento ink and used Real Red, Crumb Cake, Pumpkin Pie and Early Espresso markers to color him in.   The red and white hearts are die cuts from the Sweet & Sassy Framelits.  The lips are from the Sealed with Love set in the background, but I also gave my club members a choice of using the Hearts Decorative Mask for the background using a Sponge Dauber and Real Red ink.

Products I used:

Wednesday, February 8, 2017

Three Sale-a-Bration Trucks

Just had to try making a few little truck boxes with the Tasty Trucks set.  However, they are not all "tasty" trucks, but I just had a lot of fun making them after watching a video by Angela Pyjas. I made a school bus, an ambulance,  and an ice cream truck.  I think I need a UPS truck or mail truck to go with them. I'm sure you can think of other ideas too.   To make the box, you need 2-1/4" x 5" of cardstock scored at 1//2" on each side of the long side and 1-1/2" on each side of the short side.
Snip to the scored lines parallel to each other on the long side and use Multipurpose glue to hold to together.  I stamped the truck image and then cut it out with Paper Snips and traced it onto coordinated cardstock for the other side.  However, you could do a mirror image, but I didn't.  When you attach the trucks to the box make sure the wheels are below the box because they are what will hold the truck box up.  I filled them with candy.

Products I used:

Tuesday, February 7, 2017

Hedgehogs Love

Once again, I decided to use the hedgehogs from the Hostess set in the 2016-2017 Annual Catalog
called Love You Lots on page 199. 
  • The base of my card is Real Red cardstock cut at 4-1/4" x 11" and scored at 5-1/2" in the middle.  The next layer is Whisper White cardstock cut at 4" x 5-1/4". 
  • Then, I cut a strip of 1" x 4" of the Real Red Bright DSP and attached to the bottom of the Whisper White cardstock with Multipurpose Glue.
  • Ink up the "Love you Lots" sentiment stamp with Memento Black ink and stamp above the DSP in the center.
  • Ink up the hedgehogs with Memento Black ink and stamp above the sentiment.
  • Color in the hedgehogs with markers, Crumb Cake, Early Espresso; the flower with Real Red, Old Olive.
  • Use the Confetti Hearts Border Punch to punch out Real Red hearts.  Use the larger hearts to attach above the hedgehogs using the Fine-Tip Glue Pen.

Products I used:


Saturday, February 4, 2017

Dragonfly Dreams


 Finally had a chance to play with my Dragonfly Dreams stamp set.  Night of Navy and Island Indigo are two of favorite Stampin' Up! colors, so that is what I used for my card.  This stamp set is a two-step stamp set.  I also have the Detailed Dragon Fly Thinlets but didn't use them on the outside of my card but did for the inside.  Both can be purchased as a bundle or separately on page 26 of the 2017 Occasions Catalog.   For the front of my card on the left, I stamped the image first with Night of Navy on 3-3/4" x 5" Whisper White card stock.  Then I inked up the next stamp with Versamark ink and then inked it up again with Island Indigo.  I did pour some of my old, retired Iridescent Ice onto it and used the Heat Tool.  I sure miss this embossing powder because it really has a lot of different colors when the light shines on it.  It just sparkles!  I used the sentiment on the front "To a wonderful friend" using Versamark ink, Night of Navy ink, and Clear Embossing Powder. I used the Heat Tool to emboss it.  On the inside of my card on the right, the sentiment "Enjoy your special day!" was stamped with Island Indigo ink.  I die cut the dragonflies with the Detailed Dragon Fly Thinlets from Island Indigo cardstock.  Here's a little tip: To adhere the dragonflies inside, I put a little bit of Multipurpose Glue on a Silicone Craft Sheet and then took a sponge to it and sponged the back of the dragonflies.  It was a fantastic way to adhere them to the inside of my card without worrying about getting the glue all over them.  I learned this from another demo and had to try it with this card.  It works great!

Products I used:

Supremely Awesome Round Metal Decor

  This is another project they made on Sunday's club.  It is a Galvanized Metal Bottle Cap that I got at Dollar Tree.  I used the Deckle...