Sunday, June 23, 2019

Good Morning Magnolia - Happy Birthday!

This is a card I made for my swaps this month.  I've used Versamark ink on the Shimmery White paper to emboss with Gold Embossing Powder.  Then I used the Aqua Painter to color in the flowers and leaves.  I was inspired by Emma Goddard.  Here are the complete instructions for my card:


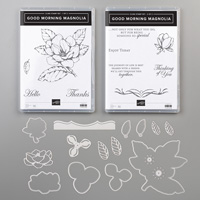
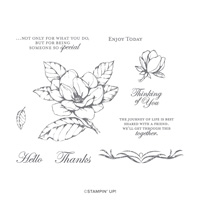
Stamp Sets:  Good Morning Magnolia, Well Said

Cardstock:  Basic Black, Mossy Meadow, Shimmery White

Ink:  Versamark, Old Olive, Mossy Meadow, Rich Razzleberry, Gold Embossing Powder

Other:  Big Shot, Stamparatus, Embossing Buddy, Aqua Painter, Layering Stitched Rectangles, Merry Christmas or Word Wishes Dies “Happy”, Heat Tool, Rhinestones, Mossy Meadow Baker’s Twine from Magnolia Lane Combo Pack, Glue Dots, Dimensionals


1.     The base of the card is Basic Black cardstock cut at 4-1/4” x 11” and scored at 5-1/2” in the middle.

2.    The second layer is Mossy Meadow cut at 4” x 5-1/4”.  Adhere to the front of the card.

3.    The third layer is 3-3/4” x 5” of Shimmery White cardstock.  Watercolor Paper will also work.  Use the Embossing Buddy on it before stamping.

4.    Put the magnolia stamp on the Stamparatus Plate and ink it up with Versamark ink.  Stamp on left-hand corner of the Shimmery White Paper inserted into the Stamparatus.  Turn the paper and stamp the lower right-hand corner.  Sprinkle with Gold Embossing Powder.  Shake off excess and heat set with the Heat Tool.

5.    Using the Aqua Painter with water inside, ink up the flower part with Rich Razzleberry ink.  Let dry!

6.    Use the Aqua Painter for the leaves with using Old Olive first.  Let dry and then use Mossy Meadow ink and the Aqua Painter

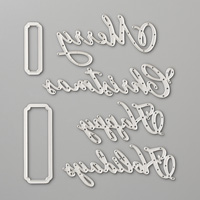
7.    Use Sizzix Adhesive Sheet on black cardstock so that you can die cut “Happy” in the die cutting machine.  Apply to upper part of card.

8.    Ink up “Birthday” from Well-Said on Shimmery White Paper and Die cut with the smallest Rectangle die.

9.    Ink up a leaf with Memento Black on Shimmery White Paper and color it in with the Aqua Painter with Old Olive and Mossy Meadow.  Let dry and die and attach with a Glue Dot to the birthday banner.

10.  Tie Mossy Meadow Baker’s Twine in a bow.  Add three Rhinestones.

Products I used are below:


Monday, June 17, 2019

Good Morning Magnolia

This was a cased card of Sage Kimble's.  I loved the colors and wanted to re-create it for myself.
Her directions were easy to follow and I've written out instructions on how I made this card.

Stamp Set:  Good Morning Magnolia

Cardstock:  Blueberry Bushel, Seaside Spray, Vellum, Perennial Essence DSP

Ink:  Early Espresso, Clear Embossing Powder; Stampin’ Blends:  Light Night of Navy, Bronze

Other:  Big Shot or Die-Cutting Machine, Magnolia Memory Die, Heat Tool, Stamparatus, Bone Folder, Embossing Buddy, Snail Adhesive, Dimensionals


1.     The base of the card is Blueberry Bushel cardstock cut at 4-1/4” x 11” and scored at 5-1/2” in the middle.

2.    The second layer is Perennial Essence DSP cut at 4” x 5-1/4” and using the Magnolia Memory Die with the curved edge, cut the bottom of one end of the DSP with the Die-Cutting Machine.  Adhere to the front of the card base.  Optional:  I also stamped a sentiment at the bottom “Enjoy Today” with Memento Black ink before adhering the DSP.

3.    Cut Vellum at 4” x 4-1/2” and use the Embossing Buddy on it before inserting into the Stamparatus.  Use the Magnolia flower stamp in the Stamparatus and ink it up with Early Espresso to stamp on the Vellum.  You might need to re-ink the stamp several times especially in the center of the flower.  As soon as you have inked it up, use Clear Embossing Powder and heat set with the Heat Tool.

4.    Use a 4” x 4-1/2” Adhesive Sheet (Sizzix Brand) on the back of the Vellum.  Remove backing and adhere to 4” x 4-1/2” Seaside Spray cardstock.  Use the die for the flower in the Die Cutting Machine to die cut the flower layers out.  Attach Dimensionals to the back and adhere to the front of the card over the DSP.

Products I used from Stampin' 'Up!:


Monday, June 10, 2019

A Good Man - It's Your Day!

This is the other card my club members made yesterday and I just love this new set called A Good Man and knew it would be perfect for a Father's Day card.  I used the sprinkle stamp from Beauty Abounds set to make it look like sand.  I used the Well-Said to create the "Happy Father's Day" inside my card.


Stamp Sets:  A Good Man, Well-Said, Beauty Abounds

Cardstock:  Night of Navy, Crumb Cake, Pool Party Whisper White

Ink:  Memento Black, Stampin’ Blends: Night of Navy, Pool Party, Crumb Cake, Ivory

Other:  Big Shot, Stitched Nested Labels Dies, Subtle Embossing Folder, Dimensionals, Multipurpose Glue


1.     The base of the card is Night of Navy cardstock cut at 5-1/2” x 8-1/2” and scored at 4-1/4” in the middle.

2.    The second layer is Crumb Cake cardstock cut at 4” x 5-1/4” and randomly stamped with the stamp from Beauty Abounds with Crumb Cake ink to appear as sand. 

3.    Ink up “It’s Your Day” with Memento Black ink and stamp it in the lower, right-hand corner.  Insert into the Subtle Embossing Folder and run through the Big Shot. 

4.    The Stitched Nested Labels Dies are from a bundle with Free as a Bird set, but used for this card.

5.    The guy in the chair stamp is inked up with Memento Black ink and colored in with the Stampin’ Blends.  Die cut with the third largest Stitched Nested Labels Die.  Then cut a Pool Party with the largest Stitched Nested Label Die.  Adhere together with Multipurpose Glue.  Add Dimensionals to the back and adhere to the front of the card.

6.    On the inside:  Ink up Happy Father’s Day from the Well-Said stamp set with Memento Black ink.  Ink up “Relax Your Way!” stamp from A Good Man stamp set below it with Memento Black ink.  At the bottom stamp the sand stamp with Crumb Cake.

Products I used:  

Supremely Awesome Round Metal Decor

  This is another project they made on Sunday's club.  It is a Galvanized Metal Bottle Cap that I got at Dollar Tree.  I used the Deckle...