Thursday, August 29, 2019

Free as a Bird - Mirror Image

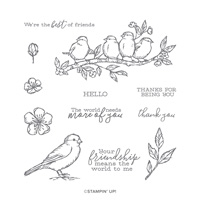
How did I reverse the stamp of the Free as a Bird stamp you might wonder.  I taught how to do this technique at my last club workshop.  Here is how I did it:


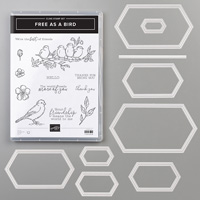
Stamp set:  Free as a Bird

Cardstock:  Old Olive, Crumb Cake, Whisper White

Ink:  Memento Black

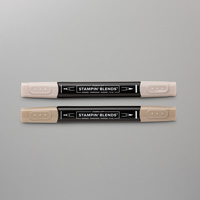
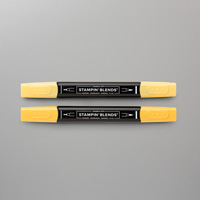
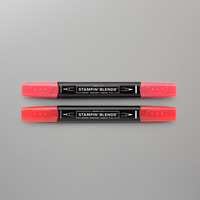
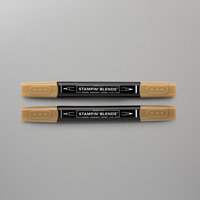
Stampin’ Blends:  Poppy Parade Dark & Light, Crumb Cake Dark & light, Soft Suede Dark & Light, Old Olive Dark & Light, Daffodil Delight Dark & Light

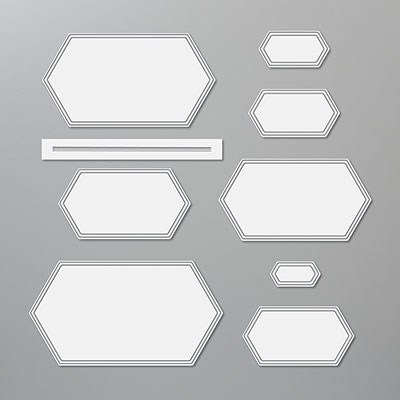
Other:  Big Shot, 3D Brick & Mortar, 3D Embossing Folder Plate #149658 for $10, Stamparatus, Silicone Craft Sheet, Stitched Nested Labels, Multipurpose Glue, Dimensionals

1.     The base of the card is Old Olive cardstock cut at 5-1/2” x 8-1/2” and scored at 4-1/4” in the middle.

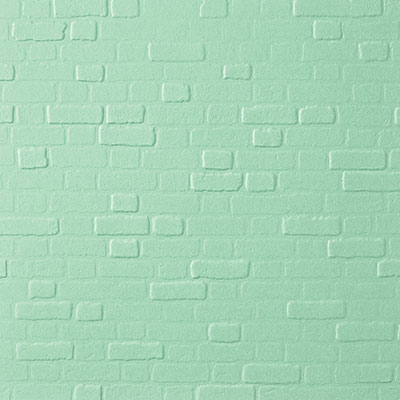
2.    The second layer is Crumb Cake cardstock cut at 4” x 5-1/4”.  First ink up the leaf stamp with Memento Black ink and randomly stamp at the top of the Crumb Cake cardstock.  Color the leaves in with the Old Olive Blends.

3.    After you color the leaves, insert into the 3D Brick & Mortar Embossing Folder and use the NEW Blue 3D Embossing Folder Plate on top and run it through the Big Shot.  (Any of the new 3D Embossing Folders will require this plate or about 6 stacks of cardstock.)  Attach to the front of the card with Multipurpose Glue.

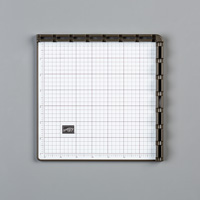
4.    Insert the Silicone Craft Sheet into the Stamparatus.  Ink up the bird stamp with Memento Black Ink and stamp it right onto the Silicone Sheet.  Very carefully, lay the 4” x 5-1/4” Whisper White cardstock on top of the inked Silicone Sheet so that it is in the left corner of the Stamparatus. Be careful not to smear the ink. Without re-inking the stamp, bring the plate back down onto the cardstock pushing down where the bird is attached to the plate. Carefully remove the paper and turn it over and ink up the bird again and stamp on the opposite side so that they are facing each other.  Clean off the silicone sheet when done.

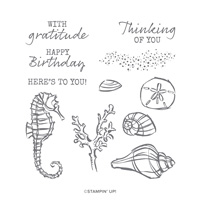
5.    Color the birds in with the Stampin’ Blends.  I made them look like cardinals. Stamp the sentiment “We’re the best of Friends” below the birds with Memento Black ink.  Use the Stitched Nested Label to die cut the birds out.  Put Dimensionals on the back and adhere on the front of the card.

6.    Stamp the inside with leaves and sentiment “Your friendship means the world to me.”

Products I used:


Friday, August 9, 2019

Seaside Notions Birthday Card


This is another Blueberry Bushel card I made,  but also it's made with the Noble Peacock Foil Sheets.  I used the Happy Birthday sentiment from the Seaside Notions set.  The Delicate Lace Edgelits Dies and Tufted 3D Embossing look great together and adding the Rhinestones to it. I believe the Tufted 3D cannot be ordered at the time of this post.  My card was inspired by Gail Ellis' card but a little different.  Here are my complete instructions on how I made this card:


Stamp Set:  Seaside Notions

Cardstock:  Blueberry Bushel, Whisper White, Noble Peacock Foil Sheets

Ink:  Memento Black

Other:  Big Shot, Delicate Lace Edgelits Dies, Layering Ovals Dies, Tufted 3D Embossing Folder, Rhinestone Basic Jewels, 1/8” Grosgrain Blueberry Bushel Ribbon, Snail Adhesive, Dimensionals


1.     The base of the card is Blueberry Bushel cardstock cut at 5-1/2” x 8-1/2” and scored at 4-1/4” in the middle.

2.    The second layer is Whisper White cut at 4” x 5-1/4” and adhered to the front of the card. 

3.    The third layer is Noble Peacock Foil Sheet cut at 3-3/4” x 5” and inserted into the Tufted 3D Embossing Folder and run through the Big Shot.

4.    The Whisper White is cut at approximately 2-1/4” by 5” and die cut with the Delicate Lace Edgelits in the Big Shot. Adhere to the Tufted 3D Noble Peacock Foil Sheet and adhered to the left side of the card. 

5.    Wrap the 1/8” Grosgrain Blueberry Ribbon around the left side and tie in a bow.

6.    Ink up “Happy Birthday” on Whisper White cardstock either in Memento Black or Blueberry Bushel ink.  Use the Layering Oval to die it out and die a bigger Blueberry Bushel to layer them together and attach with Dimensionals.

7.    Add 3 or 5 Rhinestone on the foil where the ends meet.

Products I used to make this card:


Wednesday, August 7, 2019

Lots of Cheer - Blueberry Bushel


                      It might be a little early for snowmen, I agree.  However, I'm a
snowman collector and this set Lots of Cheer from the annual catalog was calling my name.  Blue is my favorite color and I really love the In-Color Blueberry Bushel, so I wanted to make this card.  I cased the layout from Julie Gilson.  My written instructions are below: 


1.     The base of the card is Blueberry Bushel cardstock cut at 5-1/2” x 7-1/4” and scored at 4-1/4” on the 7-1/4” side

2.    On the inside, cut Whisper White cardstock at 4” x 5-1/4” and adhere to the inside of the card.  Then cut 2-5/8” x 3-7/8” Whisper White cardstock.  Ink up the sentiment “May Your Christmas Be Wrapped Up in Holiday Spirit” with Blueberry Bushel ink on the upper center of the Whisper White.  Layer it onto Blueberry Bushel cardstock cut at 2-3/4” x 4”.

3.    For the outside, cut Whisper White cardstock at 2-5/8” x 5-1/8” and cut Blueberry Bushel DSP at 2-1/2” x 5” and layer the two pieces together.  Wrap the ribbon around both layers and tie a bow before adhering to the front of the card.

4.    Cut Blueberry Bushel cardstock at 2-3/4” x 4” and add it to the front making sure it covers the inside middle section and using Dimensionals on the left side only.

5.    Cut Whisper White cardstock at 2” x 3-1/2” and use the Embossing Buddy.  Ink up the snowman stamp with Versamark ink.  Sprinkle with Silver Embossing Powder.  Shake off excess and heat with the Heat Tool.

6.    Color in the snowman with Stampin’ Blends but be very careful not to get it on the Silver Embossing.  Cut Silver Foil at 2-1/8” x 3-5/8”.  Layer pieces together with adhesives and add to the center of the Blueberry Bushel front layer.  Color in the snowman with the Wink of Stella.

Products I used:


Products Retiring Soon

  Hi Stampers: The Last Chance Products are on sale now!  That's right from 9-30 April, you can save up to 60% off of your favorite prod...