I happened to come across a YouTube video that was in Dutch (scrapexe.net) but I didn't understand it, but I've been a stamper for 22 years, so I kind of knew how she made her card even though I didn't have the instructions, so I made this card and love how it turned out and wrote my instructions in English.
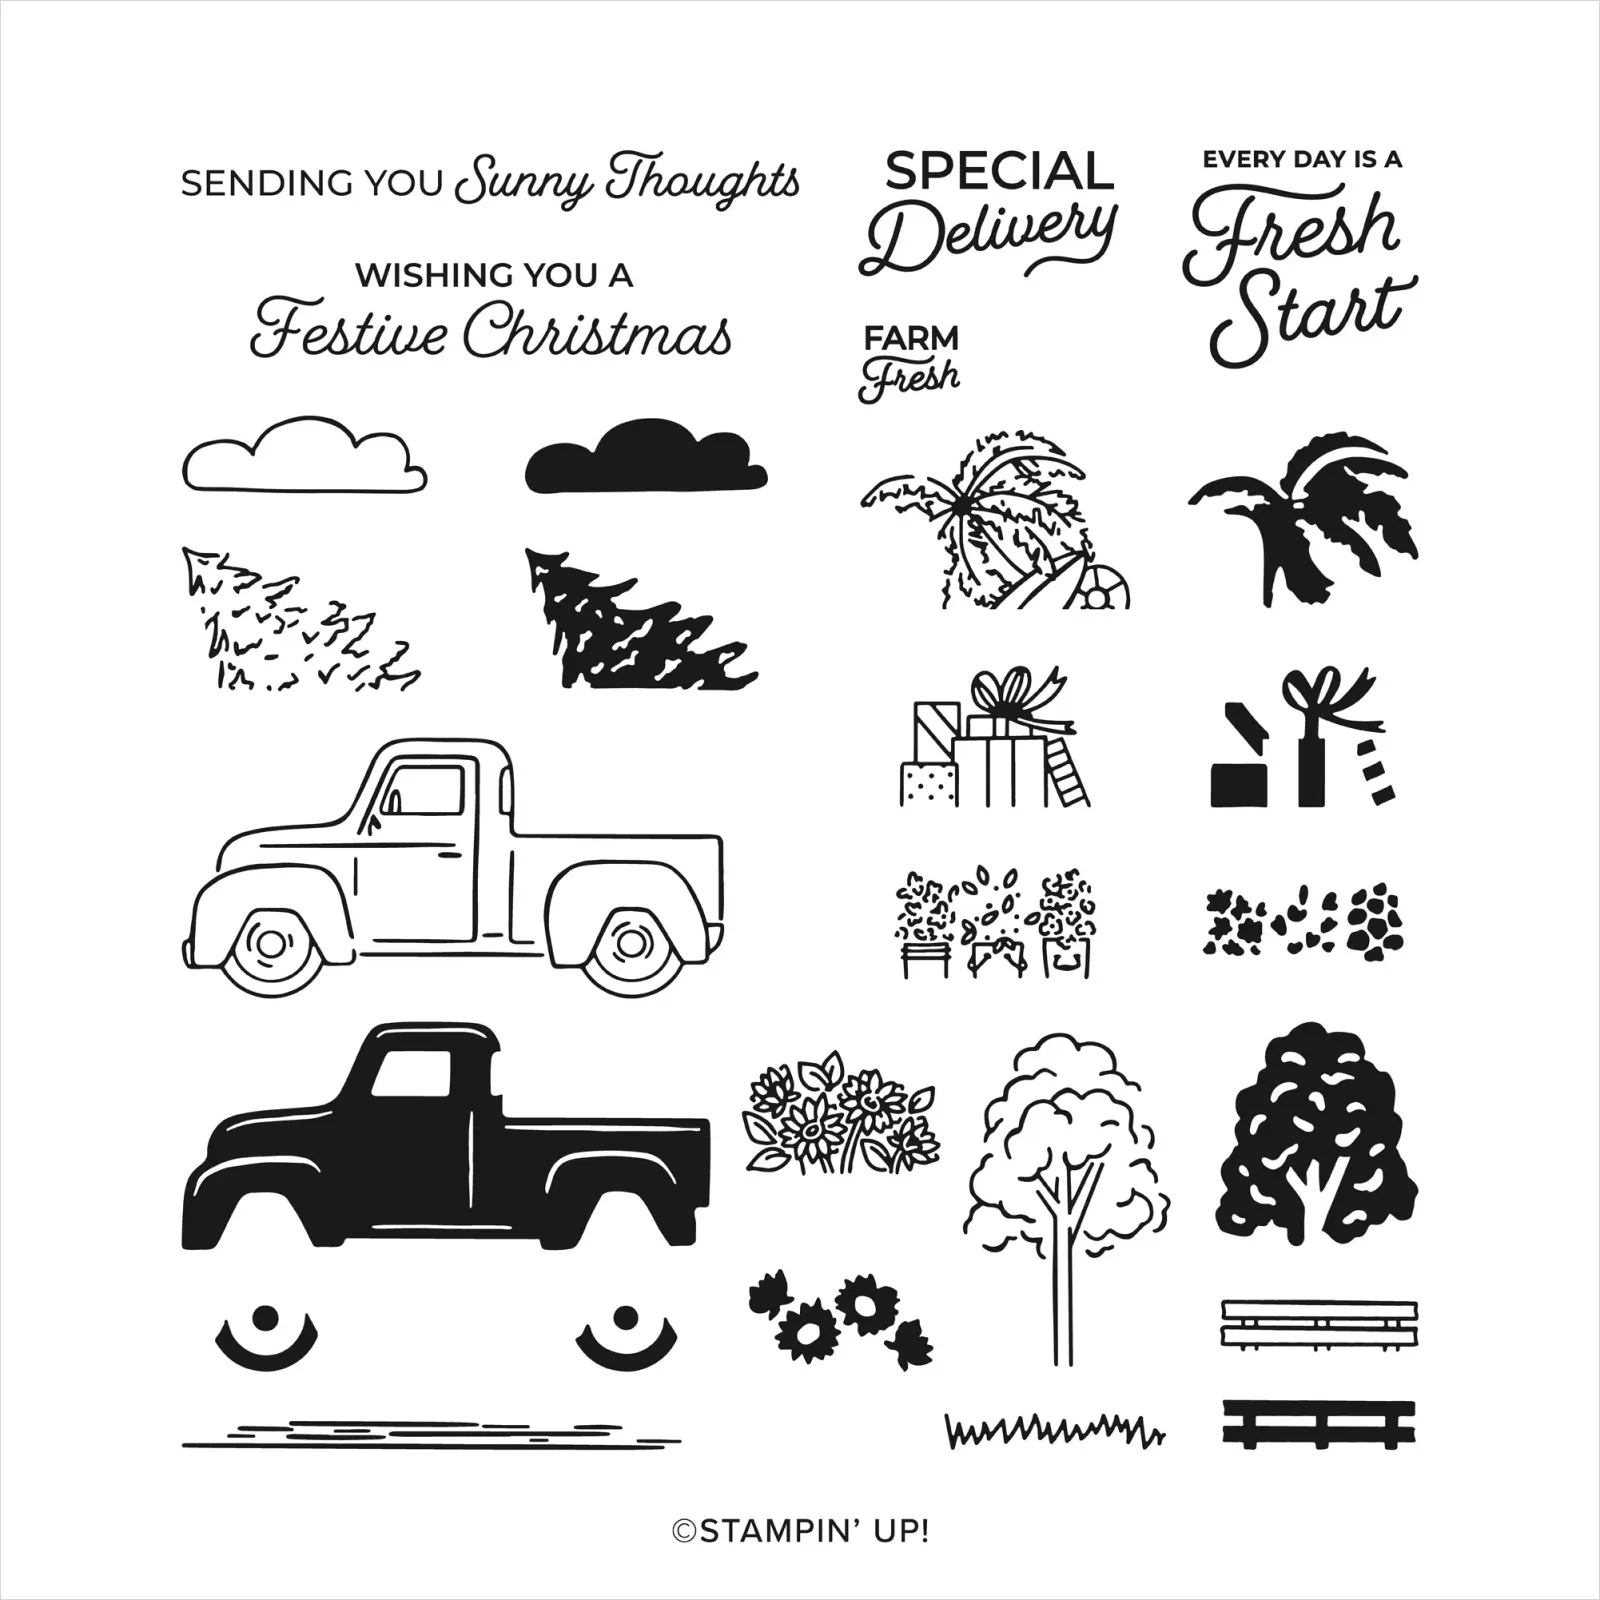
This stamp set "Trucking Along" is from the Online Exclusives
HERE, so it can't be found in any of the Stampin' Up! catalogs. It's been so popular that only the stamp set is available #162299 but not the punch until October, 2023, but it would be easy to cut out with the Paper Snips. Let me know if you have any questions. Here are my instructions:
Stamp
Sets: Trucking Along, Rays of Light, Legendary
Ride
Cardstock: Basic Gray, Smokey Slate, Thick Basic White
Ink: Tuxedo Black Memento, Daffodil Delight, Boho
Blue, Old Olive
Blends: Old Olive, Flirty Flamingo, Daffodil Delight
Other: Stampin’ Cut and Emboss Machine, Paper
Trimmer, Bone Folder, Trucking Along Builder Punch, Playing in the Rain Dies
(clouds), Stampartus, Blending Brushes, Daubers, Multipurpose Liquid Glue,
Stampin’ Dimensionals, Paper Snips, Sticky Post-its
1. The base of the card is Basic Gray
cardstock cut at 4-1/4” x 11” and scored at 5-1/2” and 2-3/4”. Fold and burnish the score lines with the
Bone Folder.
2. Insert Basic White cardstock into the
Stamparatus and ink up the Rays of Light stamp set with Daffodil Delight. Then cut the Basic White down to 4-1/2” x
3-3/4”. Then cut it in half at 2-1/4” x 3-3/4” so that it fits on the front and
middle panel.
3. There are two layers of Smokey Slate
cardstock cut at 2-1/2” x 4” each for the front panel and the middle panel. Adhere with Multipurpose Liquid Glue.
4. Cut
another Smokey Slate for the inside at 4” x 5-1/4” and one Basic White
cardstock cut at 3-3/4” x 5”. Insert it into the Stamparatus and ink up the
Rays of Light on half with Daffodil Delight ink. Layer onto the Smokey Slate with Multipurpose
Liquid Glue.
5. For the outside, cut Basic Gray cardstock
at 2-3/4” x 4”. Cut Basic White
cardstock at 2-1/2”” x 3-3/4”. Die-cut the clouds from Playing in the Rain Dies
from Sticky Post-its or Masking Paper and arrange on the upper part of the 2-1/2” x 3-3/4” Basic
White cardstock. Use Boho Blue ink and a
Blending Brush to make the sky. Use Old
Olive ink and a Blending Brush for the ground.
Remove the sticky note clouds.
6. Ink up the sentiment “Sending You Sunny
Thoughts” with Tuxedo Black Memento and stamp on the very bottom right
hand-hand side.
7. Ink up the stamp from Legendary Ride
(scenery) with Basic Gray and stamp on either side where the sky and ground
meet.
8. Ink up the outline of the truck stamp with
Tuxedo Black Memento ink on Basic White cardstock scrap. Ink up the tires stamp with Tuxedo Black
Memento. Then Ink up the palm trees and surf boards with Tuxedo Black Memento
and color in with Blends and cut it out with the Paper Snips leaving an extra ¼”
at the bottom.
9. Ink up the solid image of the truck with
Boho Blue and with a Dauber add Night of Navy ink to the fenders and top of the
cab. Huff on the stamp and stamp on top
of the stamped image. Use the Truck
Builder Punch to punch it out. Put
Dimensionals on the back and add the palm trees and surfboard to the back of
the truck with a thin layer of Multipurpose Liquid Glue. Put a Dimensional where it meets the truck
and another one behind the palm tree.
Place them between the scenery stamps.
Products I used:
Product List

")
")

 Designer Series Paper")


 Circle Punch")


")


")


