Monday, April 24, 2017

Beautiful You, Sheltering Tree - Masking


Just love using the "Beautiful You" stamp set and happy to know that it will be carried over to the new annual catalog coming out in June.  This time, I combined the set with another favorite called "Sheltering Tree" and did a mask.  We did this card at my club workshop yesterday.  Everyone thought it looked difficult, but after they made the card, they loved it and thought it was easier than they first thought.  The card reminds me of a Spring Day with Sugarplum blossoms to appear as pink dogwood trees.  It was inspired by Julie DeGruis.  Here are the instructions on how this card was made:


Stamp sets:  Beautiful You and Sheltering Tree
Cardstock:  Sugarplum In-Color (2016-2018), Daffodil Delight, Whisper White
Ink:  Archival Basic Black, Early Espresso, Pear Pizzazz, Sugarplum, Watercolor Pencils, and Blender Pens
Other:  Post-it note for masking, Paper Snips

1.     The base of the card is Sugarplum In-Color (2016-2018) cut at 4-1/4” x 11” and scored at 5-1/2” in the middle.
2.    The second layer is Daffodil Delight cut at 4” x 5-1/4”.
3.    Stamp the image of the girl with Archival Black ink towards the middle of the third layer which is 3-3/4” x 5” Whisper White Cardstock.
4.    Stamp the girl again on a post-it note so that sticky part is at the top.  Cut it out with the Paper Snips by cutting just the main image, not the shadows or black areas that stick out.
5.    Position the Post-it note mask over the girl image on the Whisper White cardstock.  Now you can stamp on top of her without getting ink in that area. 
6.    First, stamp the trees on either side of her with Early Espresso ink.  The leaves and grass were stamped with Pear Pizzazz. 
7.    Then I added Sugarplum ink for the blossoms.
8.    Ink up the sentiment “Thinking of You” with Archival Basic Black and stamp at the top or bottom, your preference.

Beautiful You - Shaving Cream


It has been awhile since I've done a shaving cream technique, but first time that I've combined embossing and bleaching with it.  Here are the details on how I made these cards:


Stamp Set:  Beautiful You
Cardstock:  Card 1:  Island Indigo, Daffodil Delight, Whisper White:  Card 2:  Island Indigo, Bermuda Bay, and Whisper White
Ink: Classic Stampin’ Ink Refills:  Bermuda Bay, Island Indigo, and Soft Sky, Versamark Ink pad
Other:  Shaving Cream, Embossing Buddy, Copper Embossing Powder, Heat Tool, Bleach in Aqua Painter,  Stampin’ Write Markers: Daffodil Delight, Island Indigo, Bermuda Bay, Soft Sky, skewer stick, tissue

1.     Base of cards are Island Indigo cut at 4-1/4” x 11” and scored at 5-1/2” in the middle.
2.    The second layer on the first card is Daffodil Delight cut at 4” x 5-1/4” and the second card is Bermuda Bay cut at 4” x 5-1/4”.
3.    Whisper White is the third layer cut at 3-3/4” x 5”.
4.    In a disposable dish large enough to place your cardstock, add your shaving cream and smooth it out with an old spatula.  Drop several of the ink refills randomly onto the shaving cream.  With the skewer, make swirls out of the ink refills.
5.    Place your cardstock on top of the swirled shaving cream and push it down.  Remove it and take a spatula to remove the shaving cream. Wipe off the excess with a tissue.  Let dry!
6.    Use the Embossing Buddy on the cardstock before inking up the Beautiful You image with Versamark ink and stamp onto the center of the cardstock.
7.    Sprinkle with the embossing powder and heat set with the Heat Tool.
8.    Use the Aqua Painter filled with bleach inside the embossed image.  May need several coats before you reach the desired white image.
9.    Color in with the Stampin’ Write markers.


Friday, April 21, 2017

Basket Bunch Slider Card


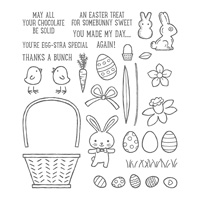
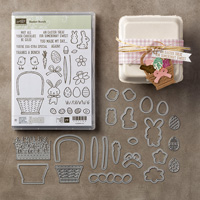
Easter is already over with, but I wanted to show you this card that was inspired by Dawn's Stamping Thoughts.  The design of the card could be used with other stamp sets, but like her, I had to use the same set for Easter.  This Basket Bunch set can be purchased as a Bundle, but it is on the retirement list, so you have until May 31st to order them before they are gone forever!

Here are my instructions for making this card, but Dawn has a video:

Basket Bunch Slider Card
Stamp Sets:  Basket Bunch
Cardstock:  Cucumber Crush, Whisper White, Crumb Cake, Blushing Bride,
Cucumber Crush DSP from the 2015-2017 In-Color Collection
Ink:  Memento Black, Early Espresso, Blushing Bride, Soft Subtles Markers
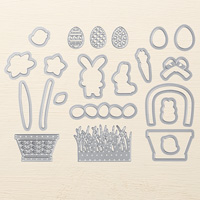
Other:  Big Shot, Basket Builder Framelits Dies, Stitched Framelits (Oval),
Classic Label, Dimensionals, 5/8” Organza Ribbon, Stapler, Glue Dots, 1-1/4” Circle Punch, Bone Folder, Stampin’ Trimmer, Tear and Tape. Scissors

1.     The card base is Cucumber Crush cardstock cut at 5-1/2” x 8-1/2”.  Score at 4” and then 8”.
2.     The Cucumber Crush DSP is cut at 3-3/4” x 5-1/4” and is adhered to the front of the card. 
3.     Turn your card onto the Stampin’ Trimmer so that the 8” score line is on the left at the 1-1/2” marker on the Trimmer.  Put the cutting blade at 1” and cut down to 4-1/2” on the Trimmer to create the slit.
4.     Now use the 1-1/4” Circle Punch to punch out a half moon at the top in the center of the card between the two score lines on the front of the card.  Close the card and punch again on the back side of the card so they match up.
5.     Cut a small piece of Whisper White cardstock at ¾” x 3.  Put one Dimensional on one end and then flip it over and put a piece of Tear and Tape at the opposite end.  Slide it into the slit so that the Dimensional is on the front of the card and slide it down all the way to the bottom of the slit and up against the slit.
6.     The Whisper White cardstock insert is cut at 3-7/8” x 5-1/4”.  Line it up inside at the very top between the two score lines and press down onto the Tear and Tape.  Then use Tear and Tape on the flap of the card and fold it to the back of the card making sure you don’t tape it to the sliding insert.
7.     The Whisper White oval shape is cut out with the largest Stitched Shapes Oval Framelits in the Big Shot.
8.     Die Cut the Cucumber Crush grass with the Basket Builder Framelits in the Big Shot.  Attach it to the oval close to the top.
9.     The basket is stamped on Crumb Cake card stock with Early Espresso ink and cut out with the Big Shot and the Basket Builder Framelits as well as the handle (no stamping on it). Attach it over the grass with Dimensionals.
10.   Attach all the other stamp images on a block.  Ink them up with Memento Black and use the Basket Builder Framelit Dies to cut them out in the Big Shot.  Color them with the Subtles markers. 
11.   Attach the Blushing Bride ribbon with a Glue Dot.
12.   Attach Whisper White Organza Ribbon at the top of the insert folding it in half and staple it.  Trim at an angle with scissors.
13.   Ink Up “You’re Egg-Stra Special” with Memento ink and stamp on Whisper White scrap and punch out with the Classic Label Punch.  Put Dimensionals on the back and adhere to the Stitched Oval under the basket.
14.   For the inside of the insert, ink up “An Easter Treat for Somebunny Sweet” with Memento Black ink. Just under the ribbon pull tag and above the basket when it is pulled up.

Products I used:


Humble Home - Christmas Card Shoebox Swap

This is the card that I made for my Christmas Card Shoebox Swap.  We had 9 customers that swapped on Sunday, but one of them couldn't ma...