Showing posts with label Versamark Ink pad. Show all posts

Friday, January 18, 2019

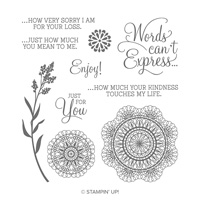
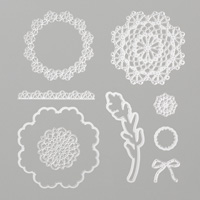
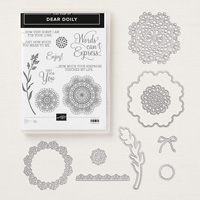
Dear Doily

Stampin' Up! had a previous doily stamp set back in 2011 (see photo below) that I just loved but long retired, so I was glad to see the new doily set in the Occasions Catalog called "Dear Doily" and so I wanted to try to recreate the card I did back in 2011 but with different colors.  Here are the instructions for my current card:  
Stamp Set:  Dear Doily (2019 Occasions) Page 47
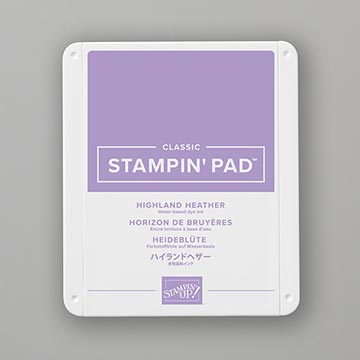
Cardstock:  Thick Whisper White, Gorgeous Grape, Highland Heather
Ink:  Gorgeous Grape, Versamark Ink Pad, White Embossing Powder
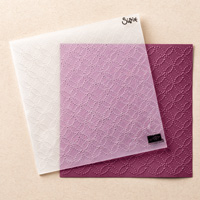
Other:  Big Shot, Heat Tool, Quilt Top TIEF, Doily Builder Thinlets Dies, Rectangle Stitched Framelit Dies, Decorative Ribbon Border Punch, Multipurpose Glue, Embossing Buddy, Snail Adhesive, Glue Dots, Dimensionals

1.     The base of the card is Thick Whisper White cardstock cut at 4-1/4” x 11” and scored at 5-1/2” in the middle.
2.    The second layer is Highland Heather cardstock cut at 4” x 5-1/4” and inserted into the Quilt Top TIEF and run through the Big Shot.
3.    The third layer is Gorgeous Grape cardstock at 4” x 2-3/4” with the Embossing Buddy rubbed over it before inking up the doily with Versamark ink before embossing with White Embossing Powder with the Heat Tool.
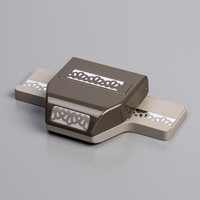
4.    Use the Decorative Ribbon Border Punch on Whisper White cardstock and add lengths to the top and bottom of the Gorgeous Grape cardstock with Snail Adhesive.
5.    Use Multipurpose Glue to attach to the front of the card.
6.    Die cut bows in the Big Shot using the Doily Builder Thinlets Dies and attach to the center of each doily with a Glue Dot.
7.    Use the Rectangle Stitched Framelit Die for the sentiment “Just For You” inked up with Gorgeous Grape ink.  Attach in the upper right-hand corner of Gorgeous Grape with Dimensionals.

Products I used:


Monday, April 24, 2017

Beautiful You - Shaving Cream


It has been awhile since I've done a shaving cream technique, but first time that I've combined embossing and bleaching with it.  Here are the details on how I made these cards:


Stamp Set:  Beautiful You
Cardstock:  Card 1:  Island Indigo, Daffodil Delight, Whisper White:  Card 2:  Island Indigo, Bermuda Bay, and Whisper White
Ink: Classic Stampin’ Ink Refills:  Bermuda Bay, Island Indigo, and Soft Sky, Versamark Ink pad
Other:  Shaving Cream, Embossing Buddy, Copper Embossing Powder, Heat Tool, Bleach in Aqua Painter,  Stampin’ Write Markers: Daffodil Delight, Island Indigo, Bermuda Bay, Soft Sky, skewer stick, tissue

1.     Base of cards are Island Indigo cut at 4-1/4” x 11” and scored at 5-1/2” in the middle.
2.    The second layer on the first card is Daffodil Delight cut at 4” x 5-1/4” and the second card is Bermuda Bay cut at 4” x 5-1/4”.
3.    Whisper White is the third layer cut at 3-3/4” x 5”.
4.    In a disposable dish large enough to place your cardstock, add your shaving cream and smooth it out with an old spatula.  Drop several of the ink refills randomly onto the shaving cream.  With the skewer, make swirls out of the ink refills.
5.    Place your cardstock on top of the swirled shaving cream and push it down.  Remove it and take a spatula to remove the shaving cream. Wipe off the excess with a tissue.  Let dry!
6.    Use the Embossing Buddy on the cardstock before inking up the Beautiful You image with Versamark ink and stamp onto the center of the cardstock.
7.    Sprinkle with the embossing powder and heat set with the Heat Tool.
8.    Use the Aqua Painter filled with bleach inside the embossed image.  May need several coats before you reach the desired white image.
9.    Color in with the Stampin’ Write markers.


Tuesday, January 12, 2016

In the Meadow

This is my newest card using the new In the Meadow stamp set from the 2016 Occasions Catalog.
It involves a lot of techniques such as embossing, watercoloring with the Aqua Painter, masking, direct to paper,  and even some brayering.  I also used a lot of colors of ink:  Daffodil Delight, Pumpkin Pie, Blackberry Bliss, Marina Mist, Old Olive So Saffron, Crumb Cake, Soft Suede, Smoky Slate, and the Versamark Pad and the retired Varsamarker.  The base of my card is Old Olive and the second layer is Marina Mist.  All the stamping and coloring was done on Whisper White.  I used the White Gel Pen on their tails, ears and spots.

Tuesday, October 13, 2015

Wonderland

This is one of my favorite sets in the 2015 Holiday Catalog.  Doreen and I made this card last week when she came to visit me and we stamped all day.  The base of the card is Island Indigo.  The layer that is stamped on is Whisper White.  First we stamped the trees with Basic Black and embossed with Iridescent Ice Embossing Powder.  Then we masked the moon over the tee top, and with the Versamark ink pad, we stamped the snowflakes and embossed them with Whisper White Embossing Powder.  Then we sponged with Pool Party, Bermuda Bay and Island Indigo.

Friday, September 18, 2015

Wonderland Window

This is a card I made using the Wonderland stamp set and the Happy Scenes stamp set. The base of my card is Mossy Meadow and the second layer is Pear Pizzazz which I inserted into the Softly Falling TIEF and ran it through the Big Shot.   I stamped the tree images with Mossy Meadow and then used Versamark ink pad.  I then sprinkled Iridescent Ice Embossing Powder over it and heat set it with the Heat Tool.  TheNight of Navy window frame was made from the Hearth & Home Thinlet Dies.  The verse "All is calm, all is bright" is also from the Wonderland stamp set.

Glow of Harvest with Painted Pumpkins

This is a card using the Designer Series Paper Glow of Harvest, which was $5 with an order of $75 or more.   Then, I used the masks to make ...