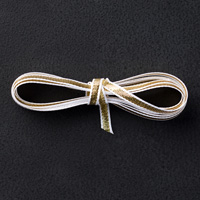
Happy Memorial Day Weekend! Finally have some time to post some of my cards that I've made this month. This is a card made from the new In-Color Fresh Fig and using the new ribbon to match is 1/2" Finely Woven Ribbon in Fresh Fig. I actually made this same card in all the new In-Colors and their ribbon. This card was inspired by Jennifer Cerizo.
1. The base of my card is Fresh
Fig.
2. The second layer is Very
Vanilla Thick cardstock and inserted into the Hexagons Dynamic TIEF and run
through the Big Shot using the Multipurpose Platform, 4” x 5-1/4” Thick Very
Vanilla cardstock inserted into the TIEF, and cutting plate on top.
3. Wrap the ½” Finely Woven Fresh
Fig Ribbon around the bottom of the Thick Very Vanilla. Attach a smaller piece and tie to the first
piece. Use scissors to cut at angles.
4. Attach card front to the base
of the card with Fast Fuse or Multipurpose Glue.
5. Using the 3-1/2” x 5-1/2” Fresh
Fig cardstock, die cut the two scalloped circles with the Layering Circle
Framelits and the Big Shot.
6. Use the 3-1/2” x 5” Very
Vanilla Thick cardstock for the sun shape medallion and use the largest circle
from the Layering Circles Framelits to die cut with it and the small Stitched
Shape Circle. Ink up the small 3-point image with Fresh Fig and stamp in
between petals as shown above.
7. Ink up the sentiment “to
think of you is to smile” with Fresh Fig ink in the center of the Stitched
circle. Take the doily and make sure there is only one because they seem to
stick together, and glue the doily to the upper front of the card.
8. To start putting the
medallions together, glue the largest Very Vanilla medallion onto the large
Scallop Fresh Fig Circle, but make the sure the petals are pulled out before
adding the adhesive.
9. Then, take the small
Stitched Circle, and layer onto the small scalloped circle and attach to the
center of the medallion.
10. Adhere all together as
shown in photo.
11. Adhere the medallion to
the doily with Adhesive.