Showing posts with label Mossy Meadow. Show all posts

Sunday, September 13, 2020

In the Pines Slimline Card


 Have you seen or tried the slimline cards yet?  They are not your normal A2 card but instead, they are cut  at7" x 8-1/2" and scored at 3-1/2" in the middle.  The envelope I'm going to use to mail my card is a legal-sized business envelope that you can purchase at any office supplies store.  I love trees, so my first slimline tree is made with the In the Pines stamp set or actually my second slimline card.  I can't stop making them with so many ideas in my head.  Here are the full instructions for my card if you'd like to make one of your own.


1.     The base of the card is Mossy Meadow cardstock cut at 7” x 8-1/2” and scored at 3-1/2” in the middle.

2.    The second layer is Soft Suede cardstock cut at 3-1/4” x 8-1/4” and adhered to the front of the card.

3.    The third layer is Whisper White cardstock cut at 3” x 8”.

4.    Ink up the base tree stamp with Mossy Meadow ink and stamp off once before stamping onto the Whisper White cardstock.  Put the smaller trees in the middle.

5.    Then ink up the outline tree stamp with Mossy Meadow ink and stamp full strength directly on top of the first image without stamping off first.

6.    Ink up the sentiment “Season’s Greetings” with Mossy Meadow ink on a scrap of Whisper White cardstock that measures ¾” x 2-3/4”.  Insert into the Banners Pick a Punch for the banner.

7.    Insert Soft Suede cardstock that measures 1” x 2-3/4” in the Banners Pick a Punch opposite side.  Layers pieces together with Multipurpose Glue.  Put Dimensionals on the back and adhere to the front of the card below the smaller trees.

I also did the inside:

Products I used to make my card:


Product List

Thursday, July 11, 2019

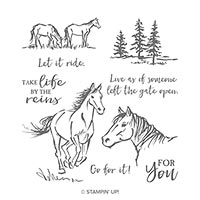
Let it Ride with Crackle Paint

This card makes a great masculine birthday card.  It was inspired by Mary Deatherage's card that I saw on Pinterest only I changed it up a bit.
Here are my instructions for this card:


Stamp Set:  Let it Ride, Crackle Paint

Cardstock; Early Espresso, Crumb Cake

Ink:  Early Espresso, Mossy Meadow

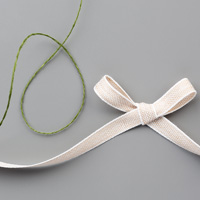
Other:  Big Shot, Pinewood Planks Embossing Folder, Story Label Punch, Mossy Meadow Baker’s Twine (from Magnolia Lane Ribbon Combo Pack), Glue Dots, Dimensionals


1.     The base of the card is Early Espresso cardstock cut at 5-1/2” x 8-1/2” and scored at 4-1/4” in the middle.

2.    The second layer is Crumb Cake cardstock cut at 4” x 5-1/4” and inserted into the Pinewood Planks Embossing Folder and run through the Big Shot.  Adhere to the front of the card.

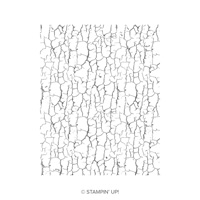
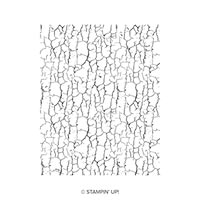
3.    The small piece of Crumb Cake cardstock is cut at 2-3/4” x 3-3/4” and the Crackle Paint stamp is inked up with Early Espresso ink.  Then ink up the trees with Mossy Meadow and stamp at the bottom without re-inking to make them appear far away.

4.    Layer it onto the 3” x 4” Early Espresso cardstock with Snail Adhesive.  Put Dimensionals on the back and adhere to the front of the card.

5.    Ink up “Happy Birthday” with Mossy Meadow ink on Crumb Cake cardstock.  Use the Story Label Punch to punch it out. 

6.    Use the Story Label Punch to punch out an Early Espresso label.  Cut it in half and layer it behind the Crumb Cake Label.

7.    Double the Mossy Meadow Baker’s Twine and tie a bow to adhere to the label with a Glue Dot.

Products I used:


Sunday, June 23, 2019

Good Morning Magnolia - Happy Birthday!

This is a card I made for my swaps this month.  I've used Versamark ink on the Shimmery White paper to emboss with Gold Embossing Powder.  Then I used the Aqua Painter to color in the flowers and leaves.  I was inspired by Emma Goddard.  Here are the complete instructions for my card:

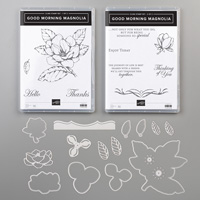
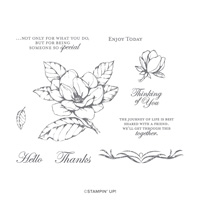
Stamp Sets:  Good Morning Magnolia, Well Said

Cardstock:  Basic Black, Mossy Meadow, Shimmery White

Ink:  Versamark, Old Olive, Mossy Meadow, Rich Razzleberry, Gold Embossing Powder

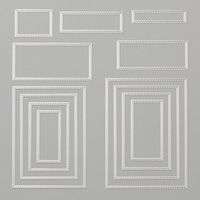
Other:  Big Shot, Stamparatus, Embossing Buddy, Aqua Painter, Layering Stitched Rectangles, Merry Christmas or Word Wishes Dies “Happy”, Heat Tool, Rhinestones, Mossy Meadow Baker’s Twine from Magnolia Lane Combo Pack, Glue Dots, Dimensionals


1.     The base of the card is Basic Black cardstock cut at 4-1/4” x 11” and scored at 5-1/2” in the middle.

2.    The second layer is Mossy Meadow cut at 4” x 5-1/4”.  Adhere to the front of the card.

3.    The third layer is 3-3/4” x 5” of Shimmery White cardstock.  Watercolor Paper will also work.  Use the Embossing Buddy on it before stamping.

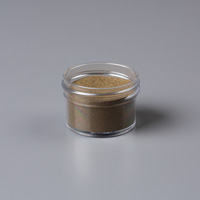
4.    Put the magnolia stamp on the Stamparatus Plate and ink it up with Versamark ink.  Stamp on left-hand corner of the Shimmery White Paper inserted into the Stamparatus.  Turn the paper and stamp the lower right-hand corner.  Sprinkle with Gold Embossing Powder.  Shake off excess and heat set with the Heat Tool.

5.    Using the Aqua Painter with water inside, ink up the flower part with Rich Razzleberry ink.  Let dry!

6.    Use the Aqua Painter for the leaves with using Old Olive first.  Let dry and then use Mossy Meadow ink and the Aqua Painter

7.    Use Sizzix Adhesive Sheet on black cardstock so that you can die cut “Happy” in the die cutting machine.  Apply to upper part of card.

8.    Ink up “Birthday” from Well-Said on Shimmery White Paper and Die cut with the smallest Rectangle die.

9.    Ink up a leaf with Memento Black on Shimmery White Paper and color it in with the Aqua Painter with Old Olive and Mossy Meadow.  Let dry and die and attach with a Glue Dot to the birthday banner.

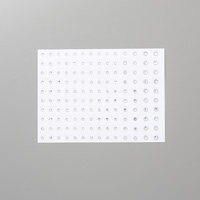
10.  Tie Mossy Meadow Baker’s Twine in a bow.  Add three Rhinestones.

Products I used are below:


Friday, April 22, 2016

Apple of My Eye - Pears


This is a card I made using the Apple of My Eye set from the 2016 Occasions catalog that will be retiring the end of May. Other sets I used were Gorgeous Grunge and Endless Birthday.  I've had fun making cards with the Apple of My Eye so it will be sad to see it go.  I followed instructions from Michelle Zindorf on how to color the pears.  The base of my card is Rich Razzleberry and the second layer is Pear Pizzazz.  The pears were stamped on Whisper White.

Tuesday, April 19, 2016

Goodbye In-Colors of 2014-2016

In memory of the In-Colors of 2014-2016 that will retire the end of May, I made this card using all 5 colors that are retiring.  All five colors are Blackberry Bliss, Hello Honey, Lost Lagoon, Mossy Meadow, and Tangelo Twist.  To make the card, the base is Blackberry Bliss cut at 4-1/4" x 11" and scored at 5-1/2".   The second layer is Mossy Meadow cut at 4" x 5-1/4".   I cut out two each of Hello Honey and Lost Lagoon at 1-3/8" square.  Then I used the Corner Rounder Punch to round two corners.  I used the Bold Butterfly Thinlet to make the Tangelo Twist butterfly and attached with a Dimensional.  Then I added "Thank You For Your Kindness" from the Wetlands stamp set with the Archival Basic Black ink.  Thank goodness Wetlands is not retiring, it is one of my favorite stamp sets.

Products I Used:


Fern & Flora - "You Make the World a Better Place"

Here is another card that I made using the Moonlit Flora Designer Series Paper.  It is so beautiful that it really makes the card without pu...