Tuesday, January 9, 2018

Waterfront cards


My cards are made from the new set from the 2018 Occasions catalog on page 48 called Waterfront.  It's a beautiful set that lets you create beautiful scenes.  It is Photopolymer with 16 stamps.  It even has palm trees.  I love this set!  Here are my instructions on how I made each card.  I used an Aqua Painter on the bottom card to make the colors pop!  The cards were inspired by watching Jackie Bolhuis' video.


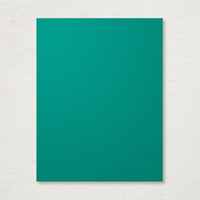
1.     The base of the cards {1 and 2) are 4-1/4” x 11”of Dapper Denim and of Tranquil Tide and they are both scored at 5-1/2” in the middle.
2.    The Shimmery White cardstock is 4” x 5-1/4”.
3.    Ink up the mountain image stamp with Soft Suede ink and stamp three mountains across the topof the Shimmery White Cardstock.  Then without reinking, stamp three more mountains to make them appear off in the distance. {2} For the second card, use the Aqua Painter brushing without squeezing to blend the Soft Suede mountains.  Let dry before adding new colors so that they won’t bleed into each other.
4.    Ink up the land/grass stamp image with Garden Green ink. {2} For the second card, use the Aqua Painter again as before on the land/grass.  Clean stamp and use the same stamp inked up with Soft Suede and fill in some blank areas.  Use the Aqua Painter and let dry.
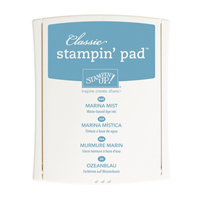
5.    For the water image stamp, use Marina Mist first and then Dapper Denim with the land/grass stamp image.  {2} Use Aqua Painter with each and let dry in between.
6.    Use the speckled stamp image with Dapper Denim over the water.
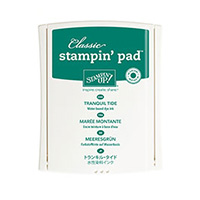
7.    Ink up the trees with Tranquil Tide ink.  {2} Use the Aqua Painter to blend each tree.
8.    Ink up the sun with Crushed Curry ink and stamp above the mountains.  {2} Use the Aqua Painter to the sun.
9.    Ink up the sentiment of choice with Basic Black ink and stamp at the bottom of the card.

Products I used:


Saturday, January 6, 2018

Lots of Lavender

This is a card that I made for my swap in December.  This is a Sale-a-Bration set called Lots of Lavender that I was able to earn it FREE with a $50 order.  It uses a 2-step technique. 
It would be perfect to use this set with the new Stamparatus!
Here are the instructions:


Stamp Set:  Lots of Lavender #147194 {P} Technique: 2-Step
Cardstock:  Perfect Plum #101889, Pear Pizzazz #131201, Whisper White #100730
Ink:  Wisteria Wonder #126985, Pear Pizzazz #131180, Perfect Plum #126963, Basic Black #140931
Other:  Big Shot #143263, Layered Leaves TIEF #143704, Multipurpose Glue #140931, Dimensionals # 104430, Clear Blocks:  A, C, D, and E

1.     The base of the card is Perfect Plum cardstock cut at 4-1/4” x 11” and scored at 5-1/2” in the middle.
2.    The second layer is Pear Pizzazz cardstock cut at 4” x 5-1/4” and inserted into the Layered Leaves TIEF and run through the Big Shot.  Attach it to the front of the base card with Multipurpose Glue.
3.    Mount the flower outline stamp onto the E Block and ink it up with Basic Black ink.  Stamp it onto 2” x 4” Whisper White cardstock.
4.    Mount the solid, watercolor image stamp onto the D Block and ink it up with the Wisteria Wonder ink over the outline image.
5.    Mount the leaves stamps onto A and B Blocks and ink them up with Pear Pizzazz ink.  Also, mount the leaf stems.  The Stamping Spots are great for these little stamped images or you can even color with a marker directly onto the stamps.  Do not use the Blends, however or they will stain your stamps.
6.    Mount the ribbon on the A block to color it with Pear Pizzazz.  The ribbon stamp is also mounted but colored in with the Perfect Plum ink pad or marker.
7.    Layer the stamped image onto the 2-1/4” x 4-1/4” Perfect Plum cardstock.  Attach to the center of card with Dimensionals or Multipurpose Glue.

Products I used:


Wednesday, January 3, 2018

Sure Do Love You Suite

Happy New Year!  This is my first post for the New Year and although it's January, I'm already thinking ahead of February with valentines, etc.  This is a box I made using the Just For You Bundle.
The name of the set is Sure Do Love you, but I also used the "Happy Anniversary" stamp from Teeny Tiny Wishes.  I wanted to show that this valentine set can also be used as an anniversary or wedding set.  The Lots to Love Box Framelits Dies made into a box will also hold the new Whisper White Narrow Note Cards & Envelopes on page 19 of the Occasions Catalog.  The Designer Series Paper on the front is called Painted with Love Specialty DSP which has lots of gold foil accents on one side.  My box was made with Rich Razzleberry cardstock and I used the Tear and Tape adhesive to hold it together.

Products I used: 

Easter Basket - Hello, Spring

Rather than an Easter Basket, I made a Spring bouquet for my basket.  I love daffodils, and although there are other flowers in this Easter ...