Wednesday, May 31, 2017
Monday, May 29, 2017
Eastern Beauty
Happy Memorial Day Weekend! Finally have some time to post some of my cards that I've made this month. This is a card made from the new In-Color Fresh Fig and using the new ribbon to match is 1/2" Finely Woven Ribbon in Fresh Fig. I actually made this same card in all the new In-Colors and their ribbon. This card was inspired by Jennifer Cerizo.
1. The base of my card is Fresh
Fig.
2. The second layer is Very
Vanilla Thick cardstock and inserted into the Hexagons Dynamic TIEF and run
through the Big Shot using the Multipurpose Platform, 4” x 5-1/4” Thick Very
Vanilla cardstock inserted into the TIEF, and cutting plate on top.
3. Wrap the ½” Finely Woven Fresh
Fig Ribbon around the bottom of the Thick Very Vanilla. Attach a smaller piece and tie to the first
piece. Use scissors to cut at angles.
4. Attach card front to the base
of the card with Fast Fuse or Multipurpose Glue.
5. Using the 3-1/2” x 5-1/2” Fresh
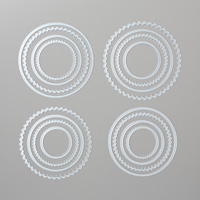
Fig cardstock, die cut the two scalloped circles with the Layering Circle
Framelits and the Big Shot.
6. Use the 3-1/2” x 5” Very
Vanilla Thick cardstock for the sun shape medallion and use the largest circle
from the Layering Circles Framelits to die cut with it and the small Stitched
Shape Circle. Ink up the small 3-point image with Fresh Fig and stamp in
between petals as shown above.
7. Ink up the sentiment “to
think of you is to smile” with Fresh Fig ink in the center of the Stitched
circle. Take the doily and make sure there is only one because they seem to
stick together, and glue the doily to the upper front of the card.
8. To start putting the
medallions together, glue the largest Very Vanilla medallion onto the large
Scallop Fresh Fig Circle, but make the sure the petals are pulled out before
adding the adhesive.
9. Then, take the small
Stitched Circle, and layer onto the small scalloped circle and attach to the
center of the medallion.
10. Adhere all together as
shown in photo.
11. Adhere the medallion to
the doily with Adhesive.
Wednesday, May 17, 2017
Touches of Texture
This is a card I made but I was inspired by Lisa Brown and Christine Riley videos. The base of my card is Dapper Denim with a layer of Daffodil delight and a strip of Tranquil Tide (new In-color).
I stamped the flower with Early Espresso on Very Vanilla cardstock and colored in the leaves with Tranquil Tide. Then I stamped the other flower image with Dapper Denim over the first flower image. The bee is stamped with Early Espresso and colored in with Daffodil Delight with a Wink of Stella. Around the edges, I used Basic Gray and Dapper Denim. The sentiment is from the stamp set Dragonfly Dreams and it was stamped on Basic Gray with Tranquil Tide.
I stamped the flower with Early Espresso on Very Vanilla cardstock and colored in the leaves with Tranquil Tide. Then I stamped the other flower image with Dapper Denim over the first flower image. The bee is stamped with Early Espresso and colored in with Daffodil Delight with a Wink of Stella. Around the edges, I used Basic Gray and Dapper Denim. The sentiment is from the stamp set Dragonfly Dreams and it was stamped on Basic Gray with Tranquil Tide.
Friday, May 12, 2017
Colorful Seasons
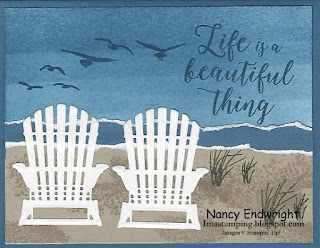
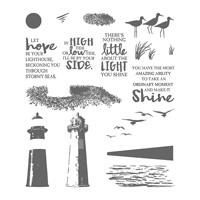
Life is a beautiful thing, especially if you are at the beach with a friend. This card was inspired by another demo Lisa Griffin Zwolanek, and so I wanted to create on of my own. The set is called Colorful Season and will be available to customers starting June 1. It also uses the Seasonal Layers Thinlet Dies that coordinates with it and can be purchased as a bundle. Of course, the birds, grass and sand are from the set High Tide which was is in the Occasions catalog but will be carried over to the new Annual Catalog. I did a little ink direct to paper for the sky and a little brayering.
Saturday, May 6, 2017
Eastern Beauty Sunflower
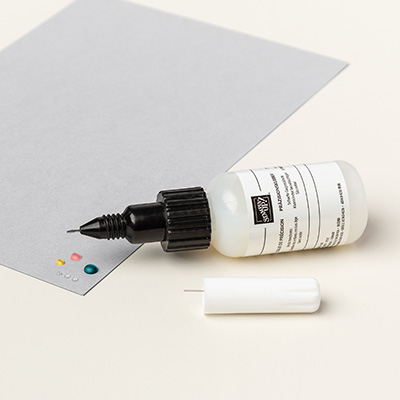
Hope this card makes you smile. It is a sunflower made with the Eastern Beauty Suite using Daffodil Delight and the Eastern Medallion Thinlets for the sunflower petals. The leaves are Tranquil Tide cardstock (new In-Color 2017-2019) and made with the Vintage Leaves and Leaflets Framelits in the Big Shot. The center of the sunflower was made of Chocolate Chip, but first I put an Eastern Gold Vinyl Sticker on before cutting it out with a scallop Layering Circle Framelit and a medallion from the Eastern Medallion Thinlets. I also cut out a Basic Black circle to put behind the Chocolate Chip medallion. I stamped the sentiment in Basic Black, but before I did that, I used some Glossy cardstock and Aqua Painter to paint across with Daffodil Delight and Tranquil Tide. More details here:
1. Base of the card is Tranquil Tide cut at 5-1/2” x 8-1/2” and scored at 4-1/4” in the middle.
2. The second layer is Daffodil Delight cut at 4” x 5-1/4” and adhered to the front of the card.
3. The third layer is Glossy White (new in June) cut at 3-3/4” x 5”. Take the Aqua Painter using Daffodil Delight and Tranquil Tide for the background on the Glossy. Let dry!
4. Ink up “To think of you is to smile” with Basic Black and stamp on the lower right side.
5. To make the sunflower, cut out two Daffodil Delight Eastern medallions in the Big Shot using the Eastern Medallion Thinlets. Sponge the petals with Crushed Curry ink.
6. Lay the sticker on Chocolate Chip cardstock, and use a Scallop Layered Circle Framelit and a small Eastern medallion to cut out the die for the center of the sunflower. Cut out a Basic Black circle using the Layering Circles Framelits. This will go behind the Chocolate Chip sunflower center.
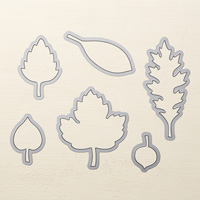
7. Die cut Tranquil Tide leaves (3) using the Leaflets Framelits to go behind the sunflowers as shown.
8. Use Fast Fuse or Multipurpose Glue to adhere the sunflower and leaves together.
9. Add to the front of the card using Dimensionals or Fast Fuse.
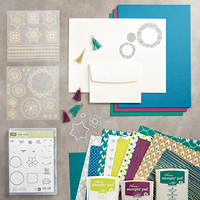
Products I used:
Products I used:
Thursday, May 4, 2017
Eastern Beauty
Hi there, stamping friends! Do these colors look new to you? Well, they are! This is my creation using some of the new In-Colors for 2017-2018. I was able to preorder some of these items last month as a bundle called Eastern Palace Suite. Now that May is here, Stampin' Up! customers can also take advantage of this pre-order too. Check it out HERE
The DSP is called Eastern Palace Specialty Designer Paper and I used it to create my card. Here are the instructions for my card:
1. The base of my card is Very Vanilla
cardstock cut at 5-1/2” x 8-1/2” and scored at 4-1/4” in the middle.
2. The second layer is the Lemon Lime Twist
color of the Eastern Palace DSP cut at 4” x 5-1/4”.
3. The third layer is the Tranquil Tide color
of the DSP cut at 3-3/4” x 5”.
4. The Lemon Lime Twist color of the DSP is
die cut with the Layering Circles Framelit.
5. The medallion if cut out with the Eastern
Medallions from Tranquil Tide cardstock and then with the Paper Snips, trim it
out at each point carefully.
6. The “Thank You” sentiment is Tranquil Tide
ink and is cut from Layering Circles Framelits and is popped up with a
Dimensional in the center of the Tranquil Medallion.
7. Attach the medallion to the Lemon Lime
Twist color of the DSP and then pop them up with Dimensionals to the front of
the card.
Products I used:
Wednesday, May 3, 2017
High Tide
It's May already! So hard to believe that it's here. This card was inspired by Lynn Starlz. I liked her card so much, I wanted to create it and I had my club make this card at the workshop. I really loved it. I added the "Thank You" from All Things Thanks because we wanted a thank you card. Here are the instructions for my card:
1. Base of card is Night of Navy cut at 5-1/2”
x 8-1/2” and scored at 4-1/4” in the middle.
2. The second layer is Marina Mist cut at 4” x
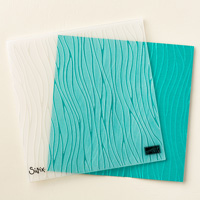
5-1/4” and inserted into the Seaside TIEF and ran through the Big Shot. Then wrap Night of Navy Solid Baker’s Twine
around it and tie a bow on the left.
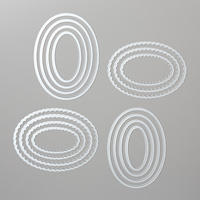
3. Cut out a Whisper White oval and a Night of
Navy oval using the Layering Oval Framelits and the Big Shot.
4. Stamp the sun with Crushed Curry ink.
5. Ink up the water with Marina Mist and stamp
the left side and then the right side.
May use a sponge with Marina Mist to fill in the water. Use Wink of Stella in the water to make it
glisten.
6. Stamp the birds in the sky using Night of
Navy ink. Stamp “Thank You” with Night
of Navy ink.
7. Adhere to the Night of Navy oval and put
Dimensional on the back and place on the front of the card over the twine.
Products I used:
Products I used:
Subscribe to:
Comments (Atom)
Valentine Kisses - Shaker Card
This shaker card was inspired by Erica Cerwin, but I changed the ribbon and colored it with a Real Red Blend instead of keeping the Bubble B...

-
Just finished making this fun waterfall card this morning. I love making waterfall cards, so I had to play around with thi...
-
Do you like to chew gum? Have you bought the gum holders with the plastic case? What do you do with the empty case when you are done with ...
-
Who would like to receive a birthday card with a wobble inside? My club remembers had fun making this card last Sunday and I decided to use...


