Showing posts with label Mint Macaron. Show all posts

Wednesday, May 13, 2020

Dressed to Impress Gift Card Holder

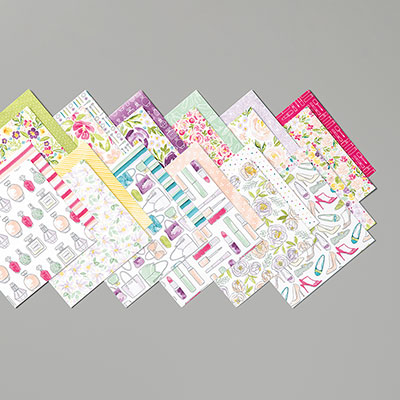
Sometimes I like to case a card from another demo if I really like it and this is one from Stampin' Annie.  It's a gift-card holder and I hadn't had a chance to play with this set yet.  I love the colors in the Best Dressed Designer Series Paper.  Sometime, we just don't have enough time to play with our DSP or we tend to hoard it.    Here are my instructions for making this card:
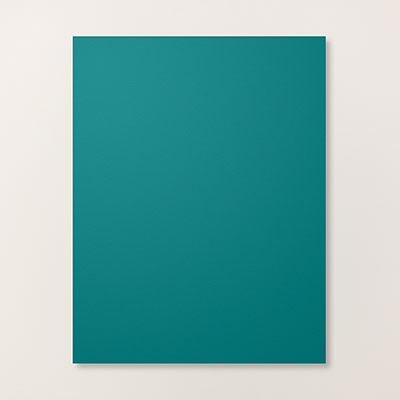
1.     The base of the card is Pretty Peacock 
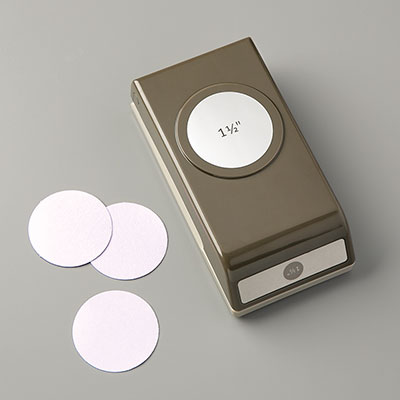
cardstock cut at 4-1/4” x 10-3/8” and score at 5-1/2” and 8-3/8”.  For the gift card holder, punch a little half 
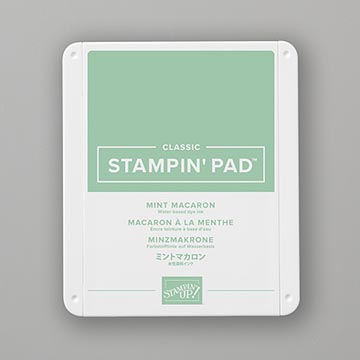
circle with the 1-1/2” Circle Punch.    Cut Mint Macaron cardstock at 2-5/8” x 4” and 
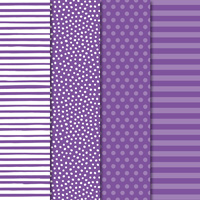
adhere to the front.  Cut the Best Dressed DSP (stripes) at 2-1/2” x 3-7/8” to adhere to the Mint Macaron on the front.
2.    For the inside, cut Whisper White cardstock at 4” x 5-1/4” and then cut a strip of the Mint Macaron (shoes) DSP for the right side.
3.    For inside, before adhering the gift card holder section with Tear and Tape to leave room for a gift card, add another Mint Macaron (shoes) DSP cut at 1-3/4” x 4”.
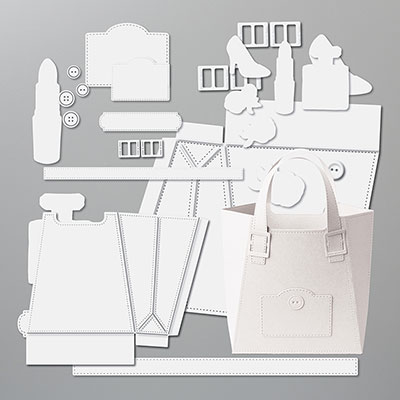
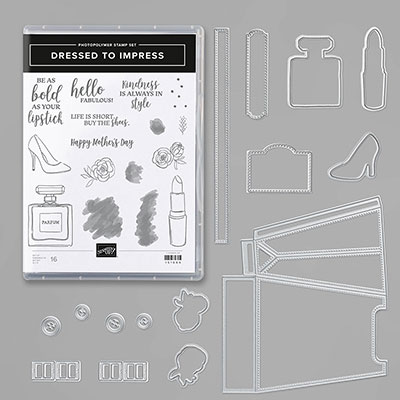
4.    Die cut 2-7/8” Circle Stitched Shapes die 
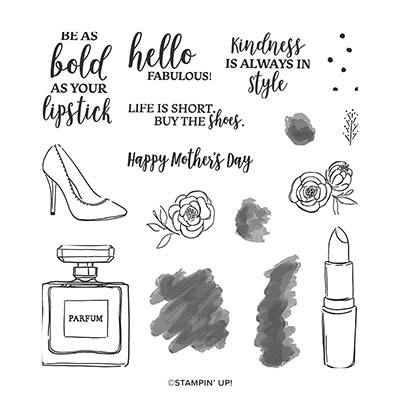
from Whisper White cardstock.  Ink up the sentiment “life is short, buy the shoes” with Memento Black ink at the top of the white circle.
5.    On a scrap of Whisper White, ink up two shoes with Memento Black ink and color them in with the Purple Posy Stampin’ Blends.  Die cut with the All Dressed-Up Dies.  Use the Wink of Stella on them.
6.    Cut one Scallop Circle from Mint Macaron cardstock using Scalloped Circle from Layering Circles Dies.  Adhere together.
7.    Add the die cut shoes to the circle and use Dimensional on the one in front.
8.    Adhere glue to the side that will attach to the front of the card.

Products I used except for some of the dies that will be carried over are not on this list, but will be in the new catalog but reconfigured with different codes:


Wednesday, October 9, 2019

Winter Woods

Winter Woods is such a beautiful stamp set that can be used for any occasion, not just for holidays. I've used this set a lot but decided to make this card a Christmas card.  I combined the colors Shaded Spruce and Mint Macaron together which I think are great together.  I did use the retired DSP Frosted Floral Specialty Paper but it just went well with my card.  So if you still have some, you might want to use it for your card too.  Here are the instructions for my card:


Stamp Set:  Winter Woods, Merry Christmas to All

Cardstock:  Shaded Spruce, Mint Macaron, Frosted Floral Specialty DSP (Retired 2018)

Ink:  Shaded Spruce

Other:  Big Shot, Subtle Embossing Folder, Merry Christmas Thinlets Dies, Beautiful Boughs Dies, Sizzix Adhesive Sheets, Snail Adhesive, Dimensionals


1.     The base of the card is Shaded Spruce cardstock cut at 4-1/4” x 11” and scored at 5-1/2” in the middle.

2.    The second layer is Mint Macaron cardstock cut at 4” x 5-1/4” and inserted into the Subtle Embossing Folder and run through the Big Shot.  Adhere to the front of the card.

3.    Ink up the large pine tree from Winter Woods stamp set with Shaded Spruce ink and use the Stamparatus to center it onto the 2-7/8” x 3-5/8” Frosted Floral Specialty DSP.  Layer onto the 2-1/2” x 3-1/2” Shaded Spruce cardstock.  Adhere with Snail Adhesive to the front of the card towards the right side.

4.    Use the Sizzix Adhesive Sheet on Shaded Spruce cardstock to die cut the “Merry” from the Merry Christmas Thinlets and the pines from the Beautiful Boughs Dies (2019 Holiday).  Die cut through the Big Shot and adhere to the front of the card.

5.    Ink up “Christmas” from Merry Christmas to All stamp set with Shaded Spruce on the Frosted Floral Specialty DSP and run it through the Subtle Embossing Folder and attached with Dimensionals to the card towards the left.

Products I used:


Monday, April 29, 2019

Best Catch and Crackle Paint

This card was cased from the very talented Julie Gilson, but I changed the Designer Series Paper color.  So glad this stamp set (Best Catch) is being carried over to the new annual catalog. The base of the card is Mint Macaron.  Then on a 3-3/4" x 5" piece of Shimmer White cardstock, I used Versamark ink and used Silver Embossing Powder as well as on the fish.  I heat embossed both and die cut the fish.
Here are more of my written instructions on how I made this card:

Stamp Set:  Best Catch, Crackle Paint (Page 44 in Occasions)

Cardstock:  Mint Macaron, Shimmery White, Silver Foil, Bright’s DSP

Ink:  Versamark, Silver Embossing Powder, Mint Macaron, Coastal Cabana and Night of Navy

Other:  Big Shot, Best Catch of the Day Thinlets, Heat Tool, Layering Circles Framelits, Stitched Shapes (Circle) Framelit Dies, Silver Metallic Thread, Aqua Painter, Snail Adhesive, Dimensionals, Faceted Dots


1.     The base of the card is Mint Macaron Cardstock cut at 5-1/2” x 8-1/2” and scored at 4-1/4” in the middle.

2.    The second layer is Shimmery White cardstock cut at 3-3/4” x 5”.  Use the Embossing Buddy on the Shimmery White cardstock. Ink up the Crackle Paint Background stamp with Versamark Ink and sprinkle it with the Silver Embossing Powder.  Heat set it with the Heat Tool.  Ink up the fish stamp the same way and die cut with the Best Catch of the Day Thinlets.

3.    Fill the Aqua Painter with water.  Now, you will need to watercolor the embossed Shimmery White cardstock that has been embossed with Silver Embossing Powder.   Use blocks to pick up the color from the ink pads and then use them as your palette to pick up the colors with the Aqua Painter.  Do the same process with the fish.  Let dry completely!  When dry, attach the fish with Dimensionals to a Whisper White die cut stitched circle layered onto a Mint Macaron Circle.  Set aside for now.

4.    The Silver Foil is cut at 2-3/4” x 2-3/4” and adhered to the front of the embossed Shimmery White cardstock that is now dry. 

5.    Cut a piece of Mint Macaron cardstock at 2-5/8” x 2-5/8” and layer 2-1/2” x 2-1/2” of the DSP. Optional: Wrap the Silver Thread around your hand 3 or 4 times and adhere to the back of layers with Snail Adhesive.  Attach Dimensionals to adhere over the Silver Foil.

6.   Add a strip of DSP cut at ¾” x 3-3/4”.  Optional:  Add Faceted Dots on either side using the Paper Piercing Tool.

7.    Add the fish layers with Dimensionals to the center of the card.

Products I used:


Wednesday, March 16, 2016

St. Patrick's Day A Nice Cuppa

This is totally a case from Maria Fennelly's video, but just had to make one to show you how beautiful this card is using A Nice Cuppa stamp set in the 2016 Occasions catalog.

  • The base of the card is Mint Macaron cut at 5-1/2" x 8-1/2" and the front of the card inserted into the Woodgrain TIEF and run through the Big Shot.
  • With the Big shot, cut out two Whisper White and two Cucumber Crush cups and also two of the tea kettle.  Trim off the handle and top and bottom of the Cucumber Crush cup and glue it to the white cup. For the other white cup, you will have the handle on the left.  
  • For the kettle, do the same as you did for the cups, and handle will be on the left.
  • Punch out an Extra Large Oval of Whisper White and a Large Oval of Cucumber Crush to represent the saucer.  Glue cup to the saucer and insert them into the Elegant Dots TIEF and run it through the Big Shot.  Attach to the bottom right side of the card. 
  • Punch out 4 or 5 of the flowers from Itty Bitty Pack Punches.  With the Paper Snips, trim the leaf to represent a stem to create a shamrock. Attach to the top of the cup. Add the Gold Wink of Stella to the shamrocks.
  • Attach a Doily in the top left corner and trim off excess to square with the card with Paper Snips.
  • Tie a 1" Dotted Lace Trim bow to the corner of the Doily.
  • Stamp with Versamark ink "Happy St. Patrick's Day" on the Botanical Gardens Vellum (SAB)
  • Sprinkle Gold Embossing Powder on it and heat set with the Heat Tool.
  • Use the Note Tag Punch to punch it out as well as from Cucumber Crush cardstock.  Attach vellum tag to green tag and adhere underneath the ribbon with adhesive.
  • With the Big Shot, cut out a spoon from the Gold Foil. Attach to the front of the card.
  • For the inside, you need to cut Whisper White cardstock at 5-1/4" x 8" and folded in the middle at 4".
  • Using the Paper Trimmer, put the folded edge up to the Trimmer, and at 1-1/2" cut 1" vertically, then at 2", cut 1" vertically, then 3" at 1" vertically, then 3-1/2" and cut 1" vertically to create the slits of your pop up.  Attach the kettle on the top left side of the slit with adhesive so to appear as it is pouring.  Glue the cup to the right of the bottom slit.
  • Stamp "You are Tea-riffic" in the top right corner with Cucumber Crush ink.
  • Attach the pop up to the card on side at a time with adhesive making sure it will open, then glue down the other side.
Products Used:

All Aflutter in Hydrangea Hue

This is a card I made last month for my monthly swap with other demonstrators in my Facebook Group (SASS - Sunshine & Smiles Swap Group)...