Showing posts with label Shaded Spruce. Show all posts

Friday, December 11, 2020

Home Together Dies - I'm Back!

 Hi All,

I've not been posting on my blog since October because I had a complete knee replacement, so I've been healing and going for physical therapy.  I haven't felt like being creative, but hoping to get back into it very soon.  Since today is my birthday, I thought I would show you what I have been doing. I decorated a little lighted tree which took me several weeks because it was hard to get up and down from my chair each time I needed something.  The idea came from Cyndi Johnson.


Here are the instructions for the ornaments for the tree and where to buy the lighted tree.


1.      For the Birdhouses: Cut Whisper White cardstock at 3” x 3” and score at 1” on all four sides to create the house cube. Use the heart-cut die to cut two from Cherry Cobbler or Shaded Spruce.  For the solid house dies, cut two from Whisper White cardstock.  Glue pieces together and add to two of the sides.

2.    For the Roof: Cut 2-1/4” x 1-3/8” from Whisper White and the same from the DSP.  Score in half.  Punch a hole in the middle of the scoreline and add a loop of the Gold Ribbon on the Whisper White Roof.  Adhere the DSP to the White Roof.

3.    The trees and snowflakes were made with the Home Together and So Many Snowflake Dies.  The trees from the DSP are two-sides using the Adhesive Sheets (I cut one Shaded Spruce tree and adhered the Gold Ribbon for the loop and then adhering the DSP trees to both sides).  Do the same for the snowflakes cutting one Whisper White snowflake, adhering the loop, and then attach the adhesive snowflakes to each side. The adhesive sheets make it so much easier.

The battery-operated tree can be purchased from Amazon and it takes three AA batteries.  Amazon.com: 24" LED Birch Tree with 24 Lights (2 Packs), Tabletop Lighted Bonsai Birch Tree Battery Powered Thanksgiving Table Decoration Light for Indoor Christmas Party Home and Bedroom Fall décor: Home & Kitchen


Sunday, October 11, 2020

Christmas Means More


.

 I love this sentiment from the movie "It's a Wonderful Life" with Jimmy Stewart.  This stamp set is called Christmas Means More and there are other sentiments in this set that I like too. This card was inspired by Mary Fish, although I didn't have the same ribbon she had which was the Shaded Spruce Wonder of the Season Ribbon Combo Pack.  I used her measurements for my card.  

1.     The base of the card is 4-1/4” x 11” and scored at 3-1/2” and 9.

2.    Cut the Tis the Season DSP at 3-1/4” x 4” and 1-3/4” x 4.

3.    Whisper White cardstock is die cut with the Stitched Shape Dies at 2-5/8” Square and with the Stitched Rectangle Dies at 3-3/8” x 4-3/4”.

4.    Cut the Shaded Spruce cardstock at 3-1/8” square and the Cherry Cobbler cardstock at 2-7/8” square.

5.    Adhere the DSP to outside flaps of the cards with Stampin’ Seal Adhesive.

6.    Adhere half the Shaded Spruce square to the left side with Stampin’ Seal Adhesive.

7.    Cut the Silver Metallic Edge Ribbon about 14”.  Use Stampin’ Seal to attach the ribbon on the Shaded Spruce square and then wrap around the entire card.

8.    Attach two Jingle Bells to some Metallic Mesh Ribbon and tie it all together in a bow on the side.

9.    Ink up the sentiment with Shaded Spruce ink and stamp on the Whisper White Stitched Shape Square.  Adhere to the Cherry Cobbler Square with Seal Adhesive.

10.  Attach to Shaded Spruce Square with Seal Adhesive or Dimensionals.

11.   Color the bells with Smoky Slate Blends.  Add Wink of Stella.


Products I used:  

Product List

Friday, October 2, 2020

In the Pines - Three Trees

October is here!  It's been a rough year for everyone and it's getting closer to the holidays, so I've made another In the Pines card using Shaded Spruce ink.  It just seems to be my favorite color for stamping trees.  I love pine trees and used to have one in my front yard, but unfortunately, a few years ago we had a hard frost that destroyed my tree and I had to have it cut down.  I guess I should replace it because I think my birds would love it.  This card has three pine trees that I stamped with the 2-step stamping technique.  Then I ran it into the Evergreen Forest 3D Embossing Folder, Sponge Brayered it on the logo side with Shaded Spruce ink and ran it through the Big Shot.  Then I added the sentiment above.

Products I used:


Product List

Wednesday, September 16, 2020

In the Pines - Shaded Spruce

Shaded Spruce is one of my favorite green colors by Stampin' Up!  It goes perfectly with In the Pines stamp set because of the evergreen trees.  The background embossed look is from the Evergreen Forest 3D Embossing Folder that I ran through my Big Shot.  There is also dies to create snow banks from the Whisper White cardstock.  I was inspired by Stampin' Kat's card but I added the snowflakes.

My Instructions:


Stamp Set:  In the Pines

Cardstock:  Thick Whisper White, Shaded Spruce, Whisper White

Ink:  Shaded Spruce

Other:  Big Shot, Pine Woods Dies, Evergreen Forest 3D Embossing Folder, Dimensionals, Snowflake Sequins, Fine-Tip Glue Pen, Multipurpose Glue


1.     The base of the card is Thick Whisper White cardstock cut at 4-1/4” x 11” and scored at 5-1/2” in the middle.

2.    The second layer is Shaded Spruce cardstock cut at 4” x 5-1/4” and inserted into the Evergreen Forest 3D Embossing Folder and run through the Big Shot.

3.    Using Whisper White cardstock, die cut the snowbanks with the Pine Woods Dies.

4.    Cut the bottom of the snowbanks a straight edge with the Paper Trimmer. 

5.    Ink up the sentiment “Season’s Greetings” with Shaded Spruce ink and stamp on the left side of the curved snowbank. Glue the snowbank down with Multipurpose Glue to the card front.

6.    Ink up the trees with Shaded Spruce (2-step stamping) and die cut with the Pine Woods Die.  Put Dimensionals on the back and adhere to the card on the right side.

7.    Attach the bottom curvy snowbank with Dimensionals.

8.    Add Snowflake Sequins using the Fine-Tip Glue Pen.


Products I used:


Product List

Saturday, June 20, 2020

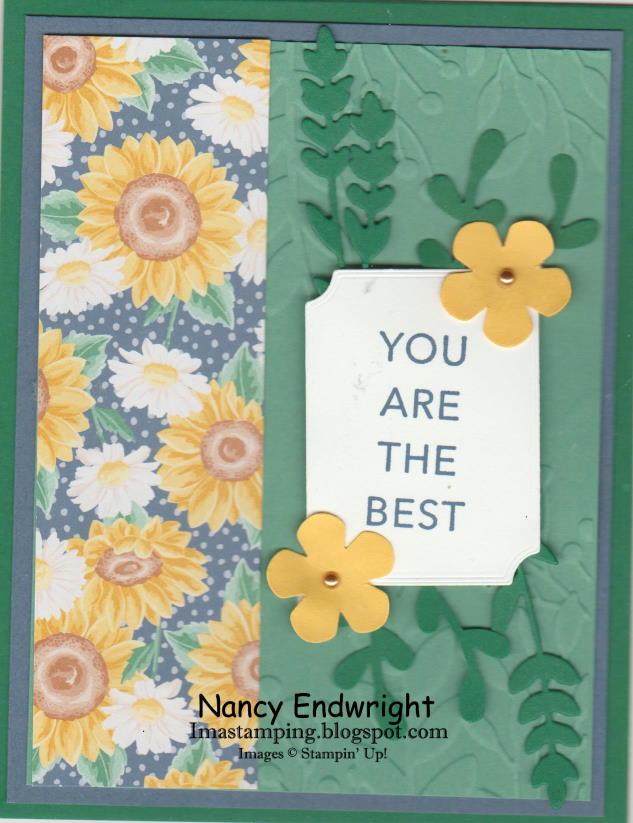
Tasteful Touches - You Are the Best


Each month, I do a swap with other Stampin' Up! demonstrators in the United States.  The theme was "New Catalog Swaps" so this is one of the new stamp sets that I ordered from the new catalog.  I love all the label dies that come with it as a Bundle to save 10%.   The new double sided tape Stampin' Seal is a lot stronger than the Snail Adhesive that Stampin' Up! used to have.  It holds a lot more too (16.4 yds. compared to 13.1 yds.) and just a dollar more.  They also carry Stampin' Seal + which is even stronger but great for 3-D projects and the same 16.4 yds.

The Big Shot is retired right now, but a newer version in the catalog is called Stampin' Cut & Emboss Machine which will be available to customers September 1. There is also a Mini Stampin' Cut & Emboss Machine but we don't know when it will be available yet.   As a demonstrator, I will be able to preorder the new Stampin' Cut & Emboss Machine in August.  
For the month of June right now, there is a special.  If you love Stampin' Up! and want to get a discount even if it's just for your hobby, you can sign up this month for $99 and get $125 worth of product plus you get to choose a FREE BUNDLE of your choice from the catalog with your Starter Kit.   I'd love to have you join my team!

Product List

Christmas Mice

  This is a card I made for a recent swap.  I love the Christmas Mice bundle.  It is so adorable.  Stamp Set:   Christmas Mice Cardstock: ...